Starrs Sourdough
  • Home
  • Subscribe
  • Recipes
    • Recipe testing
  • About
Picture

Everyday sourdough

10/6/2020

1 Comment

 
Picture
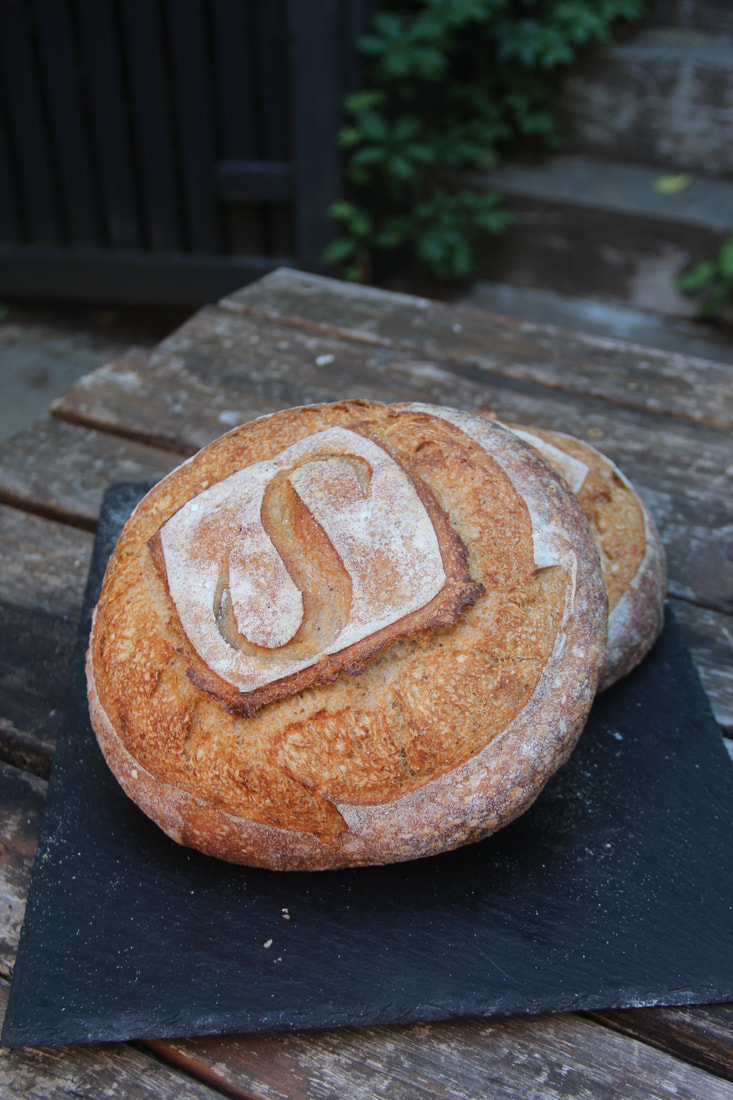
EVERYDAY SOURDOUGH RECIPE
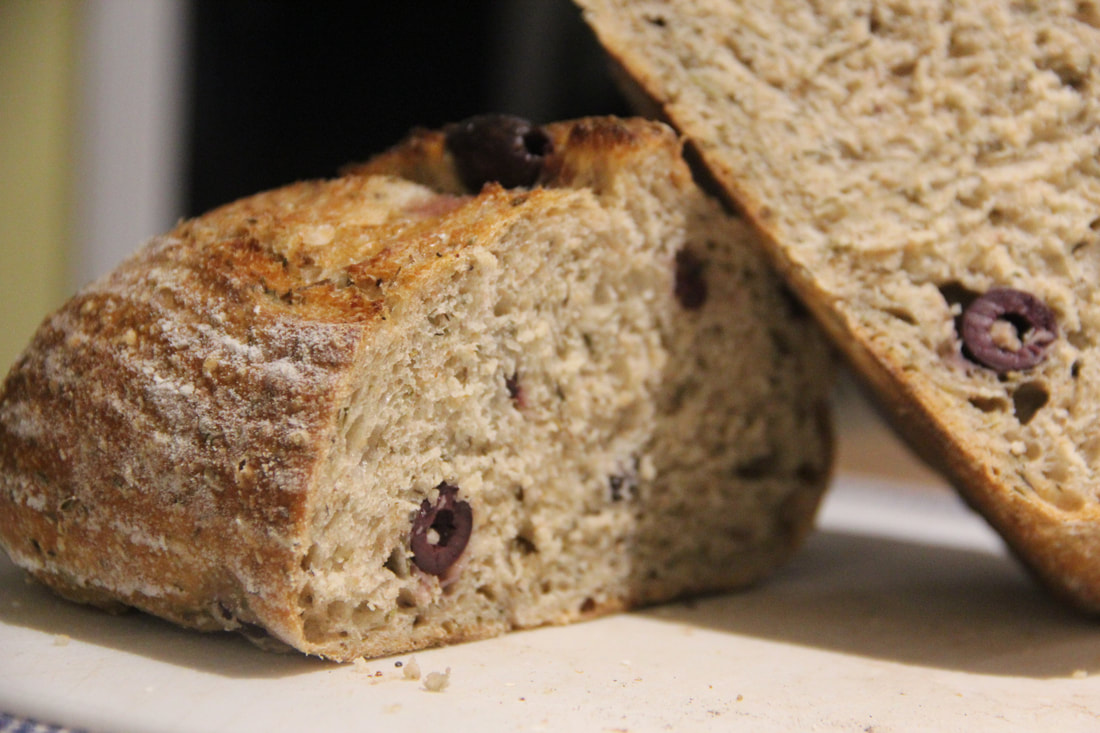
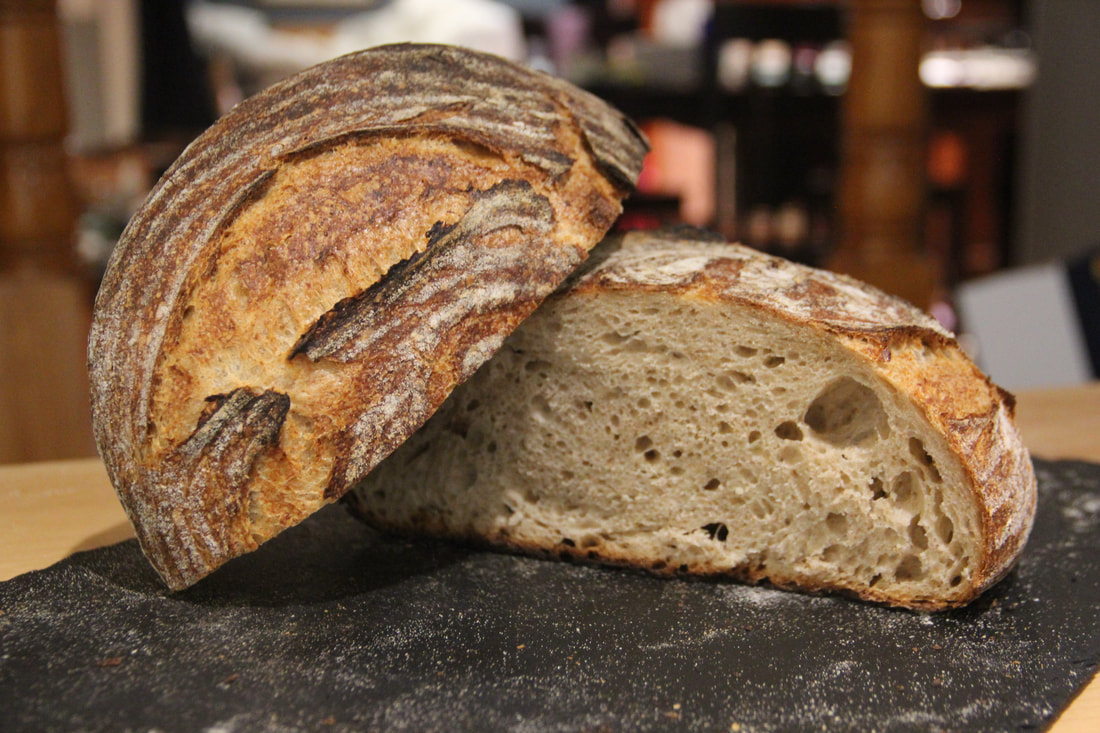
Having a staple sourdough is a wonderful joy. After making this bread over and over again, tweaking the hydration and the flour types slightly along the way, I have grown to love this loaf more through repetition. While I wouldn't call it predictable, as sourdough changes with the seasons, baking hundreds of batches of this bread does give me a consistently delicious loaf. This is the bread I recommend for your daily tables: It's versatile, classic, and dependable.

This recipe features a meld of local bread flour, all-purpose flour, local whole rye flour, and local whole wheat flour, but it can be adapted to suit your pantry. If you're looking to acquire some great local grains, I have recommendations for local farms and mills in the mid-Atlantic region included in the recipe below. You can also check out the growing directories here and here to find a source closer to home.

This recipe yields 2-1kg loaves (approximately).
LEVAIN
  • 30g mature starter
  • 134g bread flour
    • I use King Arthur's Sir Lancelot Artisan Flour, which is similar to their widely available, blue-bagged bread flour.
  • 134g water

FINAL DOUGH
  • 685g water
  • 300g levain
  • 422g all-purpose flour
    • I use King Arthur's Sir Galahad Artisan Flour, which is similar to their widely available, red-bagged all-purpose flour.
  • 285g local bread flour
    • I often use Migrash Farm's Hard Wheat No. 60, and my favorite variety is Bolles wheat. Castle Valley Mill's bolted wheat is also a great substitute.
  • 172g local whole wheat flour
    • I use Migrash Farm's Hard Wheat No. 18 when using pre-milled, or I buy whole hard wheat berries from CVM or Migrash and mill them at home to use freshly milled whole grain flour.
  • 115g local whole rye flour
    • I predominantly use CVM's whole rye berries for home milling. Purple Mountain Grown and Next Step Produce also have great rye berries and flour.
  • 22g kosher sea salt (non-iodized)

EQUIPMENT
  • Large mixing bowl + lid or towel
  • Scale
  • Bench knife
  • 2 proofing baskets (bannetons) or parchment-lined bowls
  • Dutch oven, baking stone or steel, or baking sheet and oven-safe pan (to make steam)
  • Optional: rice flour (for dusting bannetons)
Picture
Picture
EVERYDAY SOURDOUGH: TOTAL DOUGH FORMULA
Ingredient
Weight (g)
Percentage
Water
819
71.7
All-purpose flour
422
37
Bread flour
419
36.7
Whole wheat flour
172
15
Whole rye flour
115
10
Starter
30
2.6
Salt
22
2
---
---
---
TOTAL
1.999 kg
174
 EVERYDAY SOURDOUGH PROCESS

Prep
  1. Before starting the recipe, make sure you have a nice, active starter by giving it a few feedings if you usually store it in your fridge between bakes.
  2. If you are milling your grains at home, make sure you mill at least one day before mixing to ensure that the flour has cooled to room temperature (if you forget, you can offset the warmth with colder water or even ice). And, conversely, if you store your whole grain flours in the freezer to avoid spoilage, make sure you remove them when you mix your levain so that they can warm up to room temperature (if you forget, you can balance out the cold flour with warmer water).
    1. Tip: Some bakers who mill their grains themselves prefer to age their flour to develop a stronger flour with a higher protein level, which can make the resulting loaves loftier and lighter. I generally don't purposefully age my home-milled flour more than a few days, because un-aged, freshly milled flour has a pleasantly nutty taste and contains more nutrients than older flour.
Mix
  1. Approximately 8 hours before you intend to mix your final dough and a day before you want to bake your bread, mix your levain by combining 30g of mature starter (optimal starter activity is usually about 5 to 8 hours after it was fed last) with 134g tap water (cool to room temperature) in a large mixing bowl. Dissolve the starter into the water to form a milky solution and then mix in 134g of bread flour until no dry bits remain.
  2. Let ferment at room temperature, loosely covered, for about 8 hours. The levain should have doubled in size, but not started to collapse yet. The bubbles on top should be raised and shiny in the optimal fermentation window before the levain begins to recede.
    1. Tip: A warmer environment or ingredients will cause your levain to ripen more quickly, so be sure to check it after 5 hours or so to monitor its growth. If it seems like there are some cracks/collapse in the top of your levain, it has begun to recede and is over-fermented. You can still use the levain if you catch it at this point, but will want to be more careful with your dough's fermentation and proofing down the line. If the bubbles start to become small and the mixture becomes more liquidy, make your levain again. You can use your overfermented levain in a discard recipe!
    2. Tip: If your plans change after you've built your levain and you want to push back your mixing a bit, you can refrigerate it for 8 to 12 hours; just try to move it to your fridge before it hits its peak!​
  3. Once your levain is ready, assemble your ingredients for the final dough. Add 635g of water (reserving the final 50g) to your levain and mix to ensure even distribution.
    1. Tip: I like to mix by hand, but make sure you have your hair tied back and apron on before you dive in to the messy endeavor. If you prefer using a mixer, you'll want to use your mixer's dough hook on low speed. Most home mixers have a spiral dough hook or a C hook, which are used for kneading more than mixing, however, and can take a while to bring the ingredients together.
  4. Add 422g of all-purpose flour, 285g of bread flour, 172g whole wheat flour, and 115g whole rye flour. Mix until incorporated and no dry flour bits remain. 
  5. Cover and leave to rest and strengthen for 30 minutes. This is a modified autolyse; the traditional French technique calls for the flours to be hydrated before adding the leavening agent and salt in order to create a stronger, more extensible dough, but the modified version, where you mix the flour, water, and pre-ferment together and let it rest before adding the salt, is well-suited to sourdough breads because a fair amount of their hydration is in the levain.
  6. After 30 minutes, dissolve 22g of salt in the 50g of remaining water and work the solution into the dough by pinching and folding (or mixing on a low speed).
  7. Cover and let rest and absorb for 30 more minutes.
  8. Perform a series of four folds on your dough by grabbing one side of the dough, stretching, and folding it over to the middle of the dough mass. Rotate and repeat in the three remaining directions.
    1. Tip: When washing your hands before your folds, don't dry them fully. Wet hands stick less to highly hydrated dough.
    2. Tip: Watch my demo!
  9. Cover and let rest for 30 minutes and then repeat, continuing at 30-minute increments over 2.5 hours, for 5 subsequent folds. 
    1. Tip: For easier dough handling while shaping, added fermentation time (which leads to more of the traditional tangy sourness of sourdough), and more flexibility with your schedule, you can move the dough to the fridge after the final fold for a cold, long bulk ferment for 8-16 hours. Just make sure your bowl is covered well with a tight-fitting lid or cling wrap to ensure a skin doesn't form on top.
Shape
  1. Let your dough relax for 30 minutes after the final fold or simply pull your retarded dough out of the fridge before beginning the shaping process. Sprinkle your bannetons with rice flour if using and keep them or your parchment-lined bowls close by. Dust a clean, dry surface with all-purpose flour and turn your dough out onto it, patting and gently tugging the edges to form a loose, extensible rectangle.
    1. Tip: Keep your hands dry and dough-free. Any moisture or dough remnants will cause the dough to tear, snag, or stick to your fingers or surface. Use your bench knife to scrape off any bits of dough that get stuck to your counter and then lightly flour the spot. If your hands become gunky, give them a "flour wash," by sprinkling flour over your hands and rubbing them together vigorously to loosen any clingy dough.
  2. Divide the dough into two parts weighing roughly 1 kg each. You can either use your scale or embrace the fleeting opportunity for imprecision in baking and eyeball it. 
    1. Tip: Your dough may not exactly weigh 2kg, because of the weight lost each time you mix and fold the dough and scrape bits of the dough of your hands. Don't sweat it!
  3. Take one half of your dough and begin shaping by stretching out each corner and folding it in to the center to create a package of dough. Then, fold the dough in half, leaving the smooth side face up. Cup the dough with both hands, your pinkies pressing against the countertop and under the bottom of the dough mass, and pull the dough back toward you. You should feel and see the surface of the dough become more taut. Rotate the dough 90 degrees and repeat until you have a smooth boule, stopping before the dough tears from overwork.
    1. Tip: Watch my demo! (But feel free to ignore the pre-shape, which I have since deemed inessential.)
  4. If using a banneton, place the boule inside the basket with the smooth side facing down and the seam facing up. If using parchment-lined bowls, place the boule with the smooth side facing up and the seam face down for an easier transfer when you're ready to bake.
  5. Repeat with the second half of your dough.

Proof
  1. Cover your boules with a clean dishtowel and leave them in a warm place to proof (usually for about 90 - 120 minutes).
    1. ​​Tip: You can also move your boules to the fridge for a long, cold final rise after shaping, for anywhere from 8 to 24 hours. This helps if you're a beginner who's uncertain of how to gauge how proofed your dough is, and also makes it much easier to transfer and score the dough.
  2. About a half-hour before your bread is fully risen, move your dutch oven, baking steel or pizza stones, and/or steam-making device into your oven and pre-heat it to 450. If only baking one at a time, move your second boule into the fridge. If using a steam-making device (like an old cast-iron or oven safe pan) without a dutch oven, put some water on to boil.
    1. Tip: Err on the side of less proofed, as extra preheating time is better than a wobbly, overproofed boule. If it looks like your dough is fermenting too quickly, move it to your fridge while the oven continues to preheat. Your dough should spring back when you prod it, but not be too voluminous or bubbly.
Bake
  1. When your oven is heated and dough proofed, transfer your boule(s) into your dutch oven(s), score the surface quickly and confidently with a well-sharpened knife or razor blade, place the cover back on the dutch oven, and return it to the oven. Scoring allows steam to escape while the loaf is baking to controls its rise and maintain its shape. If using a baking stone or steel, you'll want to score the boule before it goes into the oven, either using a peel or parchment paper to transfer it to the oven after scoring. If using a cookie sheet, simply transfer the boule onto the sheet, score it, and load it into the oven.
    1. Tip: Watch my demo!
  2. If you're not using a dutch oven, you'll want to create additional steam inside the oven to allow the boule to continue rising before the crust sets. With proper gear and a very careful hand, pour about an inch of boiling water into the preheated steam-making device. It will create a cloud of steam immediately on contact.
    1. Tip: If using a steam-making device in a glass-fronted oven, remove the preheated receptacle and pour in the boiling water on your stovetop rather than in the oven before transferring it back to the bottom of your oven. Better safe than sorry, as sudden and high temperature changes on glass can make it shatter.
  3. Close the oven door and bake for 20 - 25 minutes.
  4. After about 25 minutes, take off the lid of the dutch oven or remove the steam-making agent and rotate your loaf. If you're baking one boule at a time, you can carefully transfer the parbaked boule onto your oven rack or a heated baking stone/steel, if the crust is set enough. Then, you can score and load your second boule, repeating steps 1 and 2 as necessary.
  5. After an additional 20 - 25 minutes, check your bread and remove it when the crust has reached your desired darkness. To test its doneness, rap the bottom of the loaf and listen for a hollow sound or take its temperature. It should read at least 200 degrees Fahrenheit.
  6. Leave to cool for at least two hours to allow the inside structure to fully set, and then dig in! 

If you give the recipe a try, I'd love to hear how it goes! Let me know in the comments or on Instagram by tagging @jennycstarrs or using #starrssourdough!
View this post on Instagram

A post shared by Jenny Starrs (@jennycstarrs) on Oct 27, 2020 at 10:47am PDT

View this post on Instagram

A post shared by Jenny Starrs (@jennycstarrs) on Jun 16, 2020 at 8:57am PDT

View this post on Instagram

A post shared by Jenny Starrs (@jennycstarrs) on Jun 20, 2020 at 1:55pm PDT

View this post on Instagram

A post shared by Jenny Starrs (@jennycstarrs) on May 13, 2020 at 10:32am PDT

1 Comment
New Jersey Bathroom Contractors link
10/24/2022 07:34:58 pm

Greatt read thankyou

Reply


Leave a Reply.

    Recipes

    Picture
    Sourdough banana muffins

    Picture
    Olive, herb, and spelt sourdough

    Picture
    Beginner sourdough

    Picture
    Roggenbrot
    ​

    Guides

    Picture
    How to store sourdough bread

    Picture
    How to maintain a sourdough starter


           Author

    I started baking sourdough bread in 2016, and was immediately hooked. Since then, I've worked as a home baker, professional baker, and cottage baker, serving up naturally leavened breads and pastries to communities in Washington, D.C., and Alaska, where I'm now based.

    Archives

    December 2021
    February 2021
    October 2020
    August 2020
    June 2020
    May 2020
    April 2020
    March 2020


    Categories

    All
    Banana
    Cookies
    Focaccia
    Muffins
    Pizza
    Rye
    Sourdough
    Sourdough Discard
    Sourdough Starter
    Tomato

Proudly powered by Weebly
  • Home
  • Subscribe
  • Recipes
    • Recipe testing
  • About