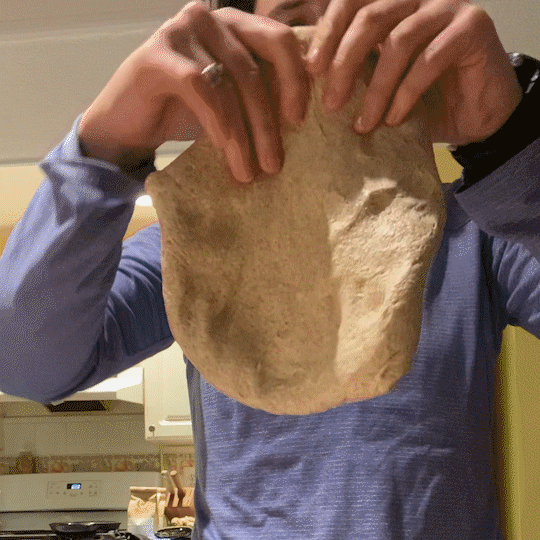
Starrs Sourdough
  • Home
  • Subscribe
  • Recipes
    • Recipe testing
  • About
Picture

Sourdough pizza

2/7/2021

0 Comments

 
Picture
SOURDOUGH PIZZA
​
​On pizza nights, rules fly out the window. Any shape, any sauce, any toppings are possible, without the need to compromise. You don’t like pineapple on your pizza? Then make your own.

I have struggled to settle on my optimal pizza recipe over the years. Recipe after recipe, formula after formula, they always ended up too slack, too stiff, too sour, not sour enough, too tough, too chewy, too delicate, or too plain ole finicky. Plus, the best recipe for a sizzling hot pizza oven is very different from the best recipe for a home oven, even with the best stones, steels, and peels at your disposal. 

This, my *ahem* pizza de resistance, came from a few months of recipe testing and crucial knowledge from Andrew Janjigian, who dedicated all of November to sharing his pizza tips in his phenomenal newsletter. The recipe is exceedingly flexible and utilitarian—while I wouldn’t use it for deep-dish (but why would you make deep-dish?), it could be used for just about any other pizza style you’re craving.
​PRE-RECIPE NOTE
​
The pizza dough should be prepared and refrigerated at least a day before baking. You can let it chill in the fridge for up to 5 days before stretching, topping, and baking, but note that the sourness and slackness of the dough will increase with time. I’ve found 1 to 2 days to be the sweet spot.

This recipe also assumes you are using a strong, active sourdough starter at 100% hydration to seed the levain. If your starter has been in the fridge for a week, add at least a day to the recipe timing below to allow for 2-3 feedings (spaced 8 hours apart) before mixing your levain. If it has been in your fridge for longer than a week, add at least two days to the recipe timing to give it enough time to return to full strength.

And finally, fermentation fluctuates with temperature. These instructions work best if your kitchen ranges from 68-72 degrees F. If your house runs a little warmer, use cooler water and/or store your flour in the freezer. If your thermostat registers a bit cooler, use warmer water (never hot) or try storing your levain and dough in the oven with the light on while it's fermenting.

​
TOTAL TIME: 1.5 days   ACTIVE TIME: 1.5 hours   INACTIVE TIME: 35.5 hours
​

ACTIVE LEVAIN MIX TIME:  15 minutes
INACTIVE LEVAIN FERMENTATION TIME:  6-8 hours   

ACTIVE FINAL DOUGH MIX & FOLD TIME:  30 minutes
INACTIVE FINAL DOUGH FERMENTATION TIME:  4 hours
ACTIVE FINAL DOUGH SHAPING TIME:  15 minutes
INACTIVE FRIDGE FERMENTATION TIME:  24 - 120 hours (1 - 5 days)

INACTIVE ROOM TEMP. REST & OVEN PREHEATING TIME:  1 hour
ACTIVE SHAPING, TOPPING, & BAKING TIME:  30 minutes
RECIPE YIELD: 2 x 450g large pizza crusts or 4 x 225g personal pizza crusts

LEVAIN
20g starter
30g AP flour
30g wheat flour
60g water

FINAL DOUGH
115g levain
270g water
20g olive oil
240g all-purpose (AP) flour
240g whole wheat flour (preferably a lower protein content variety, like Warthog, and not a high protein bread flour)*
12g sea salt (non-iodized; I use Diamond Kosher Sea Salt)
Picture
*If you prefer less wheat for a lighter texture, you can decrease the whole wheat flour to 80g,  increase the AP flour to 400g, and decrease the water to 250g in the final dough recipe.
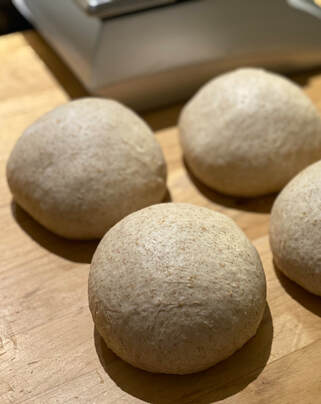
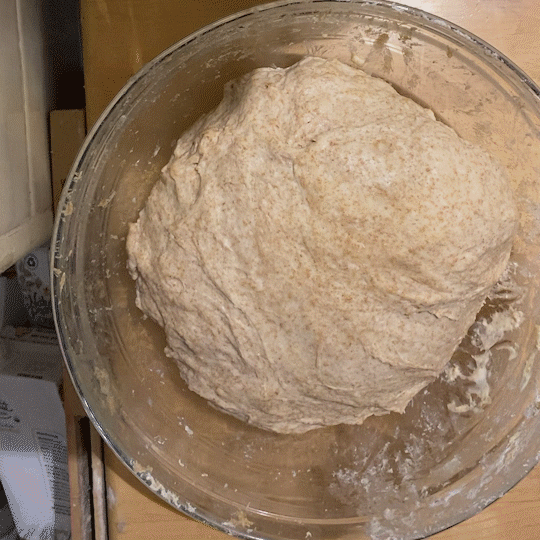
BAKERS PERCENTAGES (OVERALL)
61% water
50% whole wheat flour
50% all-purpose flour
3.7% olive oil
3.7% sourdough starter
2.2% salt


INSTRUCTIONS
Picture
MIXING

​1. About 6 to 8 hours before you plan to mix your pizza dough, build your levain by mixing 20g of sourdough starter with 60g of room temperature water, 30g AP flour, and 30g wheat flour in a container large enough to allow it to expand three times over. Cover and leave to ferment at room temperature.

​2. When your levain has more than doubled in size and has a subtly domed surface with shiny, protruding bubbles, it’s ready for mixing.
​3. Take 115g of your levain and mix with 270g room temperature water and 20g olive oil. Add 11g salt and 240g each of all-purpose flour and whole wheat flour, mixing until combined and homogeneous. I prefer to use my hands, but you may also use a spatula or the low speed of a mixer with a bread hook. If the dough feels too tough or dry, add water in tbsp increments until the dough comes together and feels pliable.
​4. Cover the dough with a dish towel or lid and leave it to rest at room temperature (70-72 F) to bulk ferment for 4 hours total, with two sets of folds to build its strength at the 1-hour and 3-hour marks. When folding the dough, you want to test its elasticity by picking up one side of the dough, stretching it out as far as you can without tearing, and then folding it back over the dough. Rotate and repeat three more times, one for each side, during each series of folds (note that the dough will stretch less and less as you rotate and repeat; that's normal!).

SHAPING

1. The dough will go from shaggy and a tad sticky to smooth and extensible during the course of the bulk fermentation. An hour after the last fold, lightly flour a clean surface and turn out the dough onto it. Pat the dough down to release any air and gently stretch it into a rough rectangle before dividing into two. 

​2. Taking one piece of dough, stretch and fold each corner into the center, fold the entire package in half so that the smooth surface is facing up, and then shape into a ball. Repeat for the other piece.

​
3. Lightly spritz or roll the dough in olive oil, then cover (plastic, unfortunately, works best here) and refrigerate if you plan to bake in the next five days. If making farther in advance, you can freeze your dough after 24 hours in the fridge and then move it back to the fridge the day before to defrost.

BAKING
Picture
Folding
Picture
Shaping
1. One hour before you plan to shape and bake your ‘zas, take the wrapped dough balls out of the fridge to allow them to come to room temperature. This will also help them loosen for easier shaping. To prepare for the coming inferno from your oven, consider turning down your heat or turning up your A/C at this point.

2. If you’re using pizza stones, steels, or cast iron pans, place them in your oven and turn it to pretty much as hot as it can safely go (50 degrees less than its max, so often 500 - 550 degrees for a home oven) when you remove your dough from the fridge. If you’re not using any of those accoutrements, you can wait to heat the oven until about 30 minutes before baking. If you have a not-so-nice baking sheet, you can place that in the oven to pre-heat with it.
Picture
Stretching
​3. Assemble your sauces, cheeses, and toppings and cut two pieces of parchment paper to be a bit larger than your desired pie size. The 450g dough balls are usually just right for a thin-crust 14” or a slightly thicker 12” pie. The smaller 225g dough ball is perfect for a personal size, 4-slice pie that fits into a 10" cast iron pan. If you will be baking on a pre-heated surface within your oven, place the parchment paper on an upside-down baking sheet or a peel for easy oven transfer. If not, you can simply place the parchment on a right-side-up baking sheet.

​4. Unwrap the pizza dough and lift it up, with one half hanging down, letting gravity start to stretch it out. Work your hands clockwise around to allow the dough to stretch evenly, taking care not to let it tear. When it is sufficiently stretched, place it on the prepped parchment paper. Press and stretch any thicker pockets so that it is an even thickness, with the outer inch thicker than the rest. Poke holes into the center of the dough with a fork to prevent air bubbles.


5. Top with your sauce, cheese, and toppings of choice. If using a pre-heated surface within your oven, slide the pizza (parchment and all) off the pan and onto the surface. If not, simply place the pizza on the pan into your oven.

6. Bake for 10 - 12 minutes or until the crust is just-blistered and bronzed. If you’re lucky enough to have a top-broiler on your home oven, turn it on for the final minute to get your cheese and toppings nice and toasty.
Picture
Pizza al taglio (pizza by the cut)
Picture
Pizza bianca (white pizza)
​7. Repeat for the other pizza and enjoy the fruits of your labor!
0 Comments

Everyday sourdough

10/6/2020

1 Comment

 
Picture
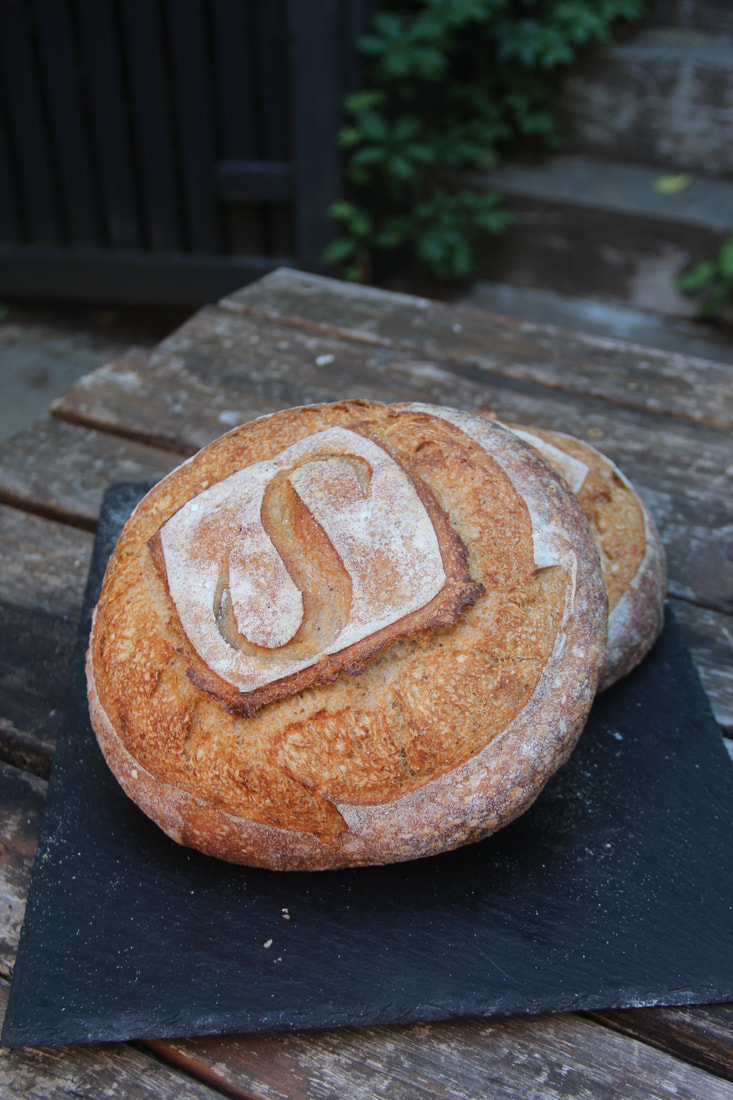
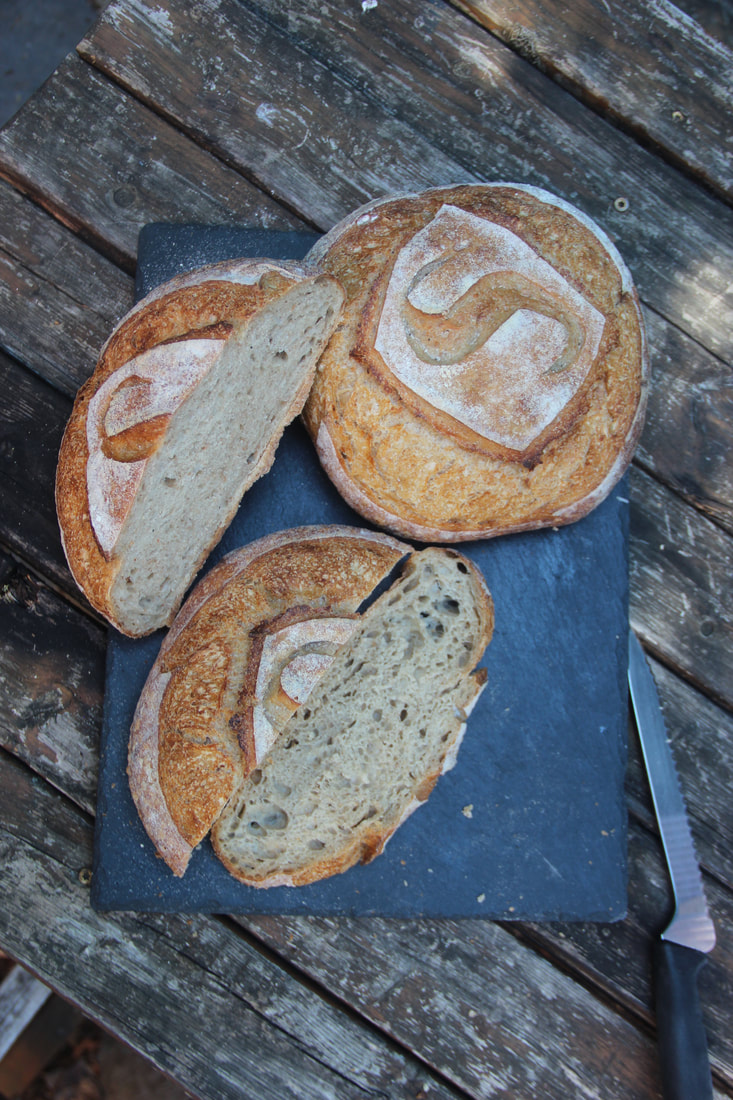
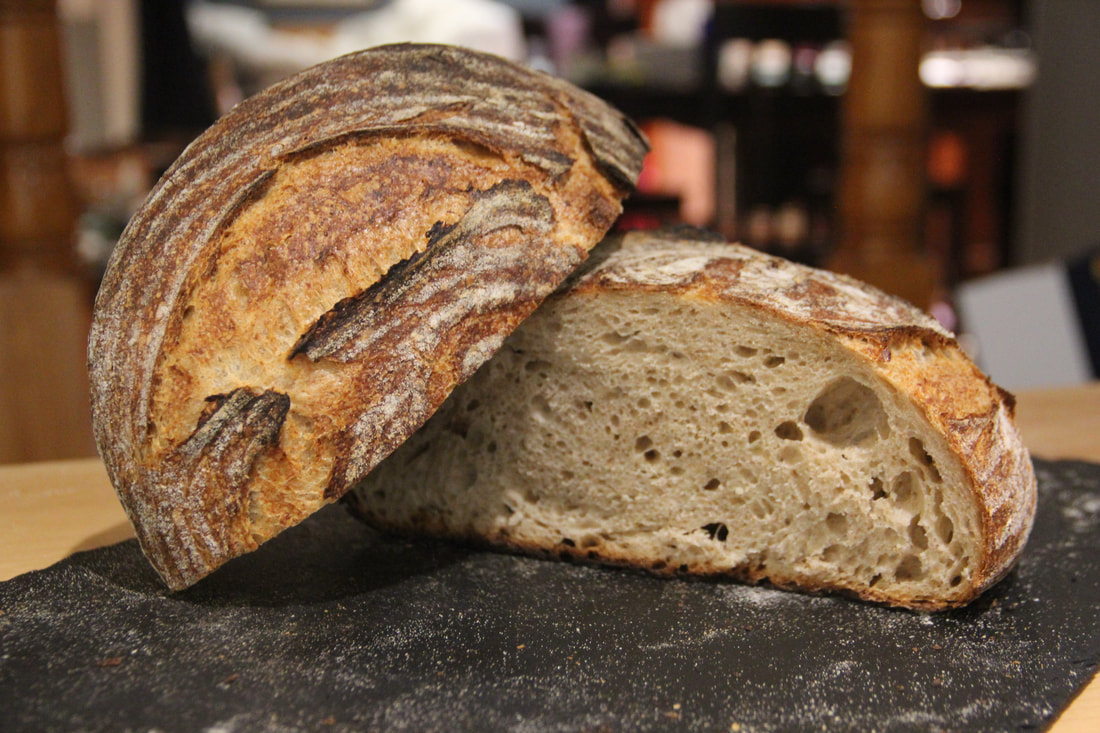
EVERYDAY SOURDOUGH RECIPE
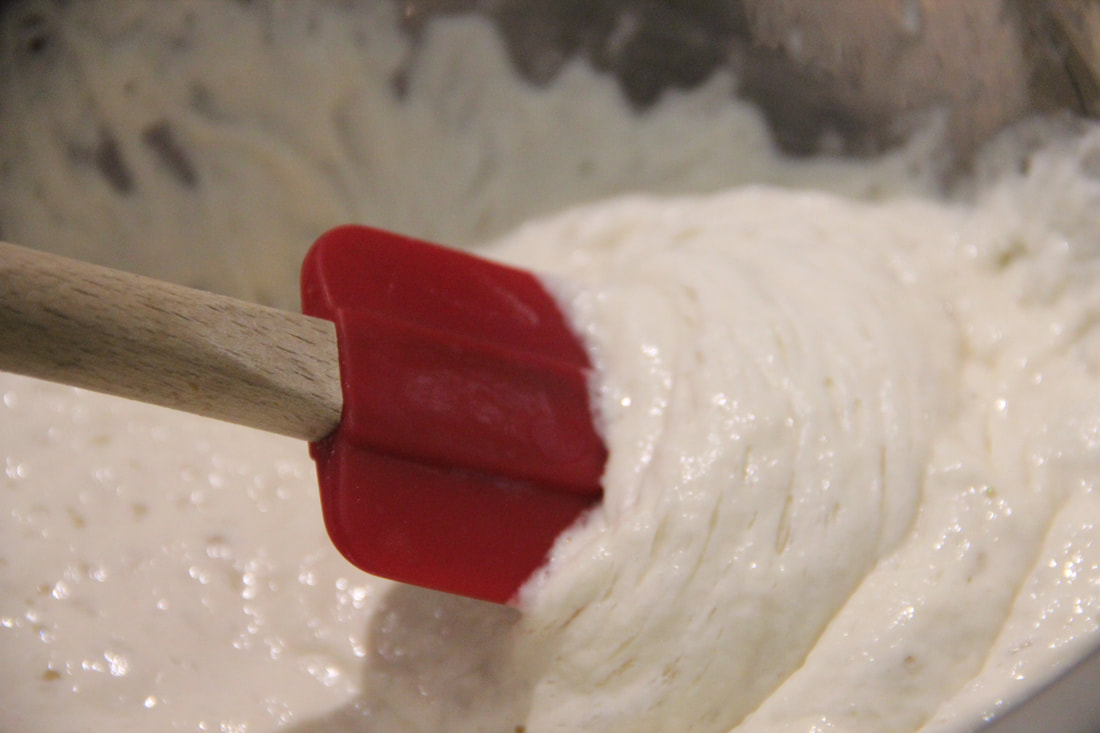
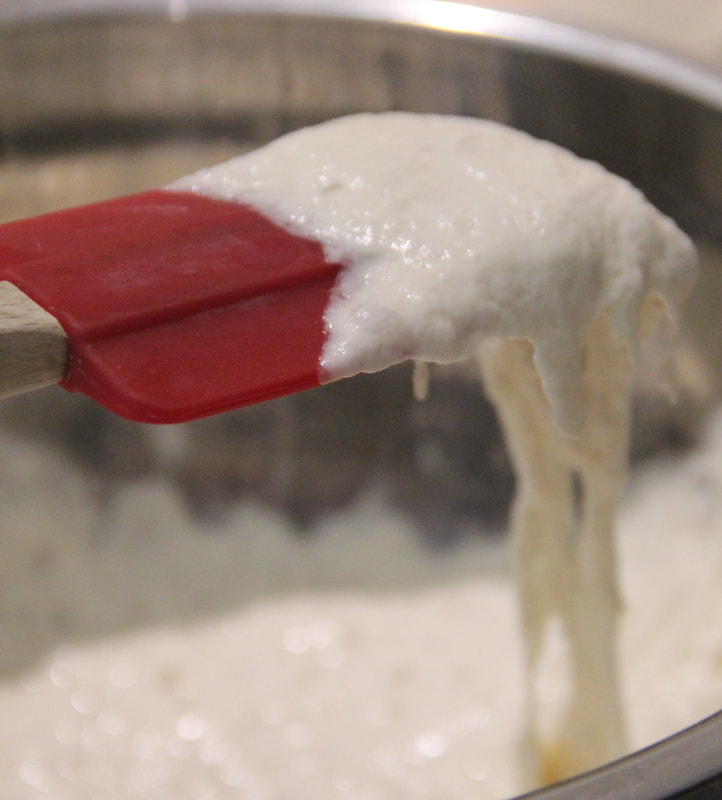
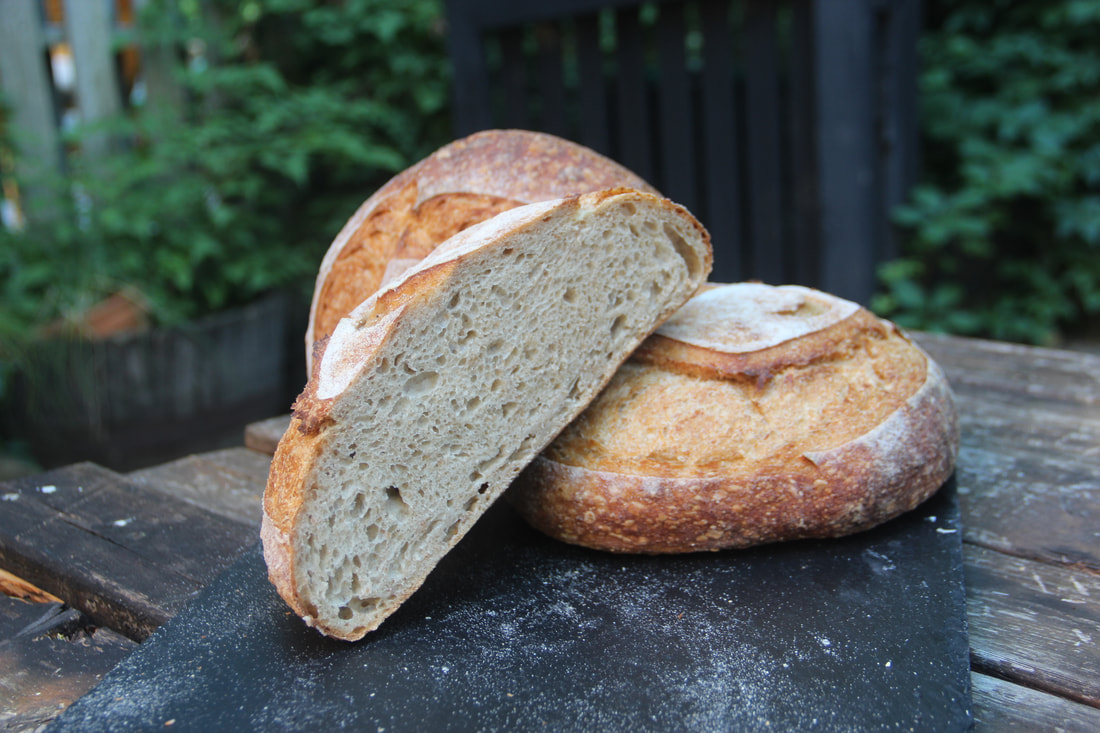
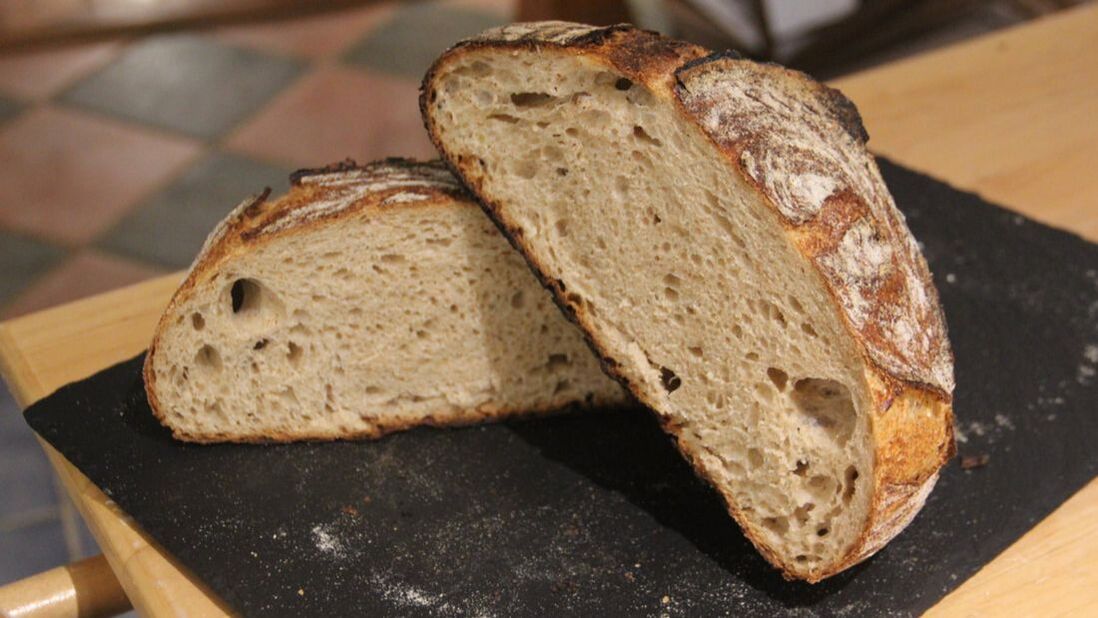
Having a staple sourdough is a wonderful joy. After making this bread over and over again, tweaking the hydration and the flour types slightly along the way, I have grown to love this loaf more through repetition. While I wouldn't call it predictable, as sourdough changes with the seasons, baking hundreds of batches of this bread does give me a consistently delicious loaf. This is the bread I recommend for your daily tables: It's versatile, classic, and dependable.

This recipe features a meld of local bread flour, all-purpose flour, local whole rye flour, and local whole wheat flour, but it can be adapted to suit your pantry. If you're looking to acquire some great local grains, I have recommendations for local farms and mills in the mid-Atlantic region included in the recipe below. You can also check out the growing directories here and here to find a source closer to home.

This recipe yields 2-1kg loaves (approximately).
LEVAIN
  • 30g mature starter
  • 134g bread flour
    • I use King Arthur's Sir Lancelot Artisan Flour, which is similar to their widely available, blue-bagged bread flour.
  • 134g water

FINAL DOUGH
  • 685g water
  • 300g levain
  • 422g all-purpose flour
    • I use King Arthur's Sir Galahad Artisan Flour, which is similar to their widely available, red-bagged all-purpose flour.
  • 285g local bread flour
    • I often use Migrash Farm's Hard Wheat No. 60, and my favorite variety is Bolles wheat. Castle Valley Mill's bolted wheat is also a great substitute.
  • 172g local whole wheat flour
    • I use Migrash Farm's Hard Wheat No. 18 when using pre-milled, or I buy whole hard wheat berries from CVM or Migrash and mill them at home to use freshly milled whole grain flour.
  • 115g local whole rye flour
    • I predominantly use CVM's whole rye berries for home milling. Purple Mountain Grown and Next Step Produce also have great rye berries and flour.
  • 22g kosher sea salt (non-iodized)

EQUIPMENT
  • Large mixing bowl + lid or towel
  • Scale
  • Bench knife
  • 2 proofing baskets (bannetons) or parchment-lined bowls
  • Dutch oven, baking stone or steel, or baking sheet and oven-safe pan (to make steam)
  • Optional: rice flour (for dusting bannetons)
Picture
Picture
EVERYDAY SOURDOUGH: TOTAL DOUGH FORMULA
Ingredient
Weight (g)
Percentage
Water
819
71.7
All-purpose flour
422
37
Bread flour
419
36.7
Whole wheat flour
172
15
Whole rye flour
115
10
Starter
30
2.6
Salt
22
2
---
---
---
TOTAL
1.999 kg
174
 EVERYDAY SOURDOUGH PROCESS

Prep
  1. Before starting the recipe, make sure you have a nice, active starter by giving it a few feedings if you usually store it in your fridge between bakes.
  2. If you are milling your grains at home, make sure you mill at least one day before mixing to ensure that the flour has cooled to room temperature (if you forget, you can offset the warmth with colder water or even ice). And, conversely, if you store your whole grain flours in the freezer to avoid spoilage, make sure you remove them when you mix your levain so that they can warm up to room temperature (if you forget, you can balance out the cold flour with warmer water).
    1. Tip: Some bakers who mill their grains themselves prefer to age their flour to develop a stronger flour with a higher protein level, which can make the resulting loaves loftier and lighter. I generally don't purposefully age my home-milled flour more than a few days, because un-aged, freshly milled flour has a pleasantly nutty taste and contains more nutrients than older flour.
Mix
  1. Approximately 8 hours before you intend to mix your final dough and a day before you want to bake your bread, mix your levain by combining 30g of mature starter (optimal starter activity is usually about 5 to 8 hours after it was fed last) with 134g tap water (cool to room temperature) in a large mixing bowl. Dissolve the starter into the water to form a milky solution and then mix in 134g of bread flour until no dry bits remain.
  2. Let ferment at room temperature, loosely covered, for about 8 hours. The levain should have doubled in size, but not started to collapse yet. The bubbles on top should be raised and shiny in the optimal fermentation window before the levain begins to recede.
    1. Tip: A warmer environment or ingredients will cause your levain to ripen more quickly, so be sure to check it after 5 hours or so to monitor its growth. If it seems like there are some cracks/collapse in the top of your levain, it has begun to recede and is over-fermented. You can still use the levain if you catch it at this point, but will want to be more careful with your dough's fermentation and proofing down the line. If the bubbles start to become small and the mixture becomes more liquidy, make your levain again. You can use your overfermented levain in a discard recipe!
    2. Tip: If your plans change after you've built your levain and you want to push back your mixing a bit, you can refrigerate it for 8 to 12 hours; just try to move it to your fridge before it hits its peak!​
  3. Once your levain is ready, assemble your ingredients for the final dough. Add 635g of water (reserving the final 50g) to your levain and mix to ensure even distribution.
    1. Tip: I like to mix by hand, but make sure you have your hair tied back and apron on before you dive in to the messy endeavor. If you prefer using a mixer, you'll want to use your mixer's dough hook on low speed. Most home mixers have a spiral dough hook or a C hook, which are used for kneading more than mixing, however, and can take a while to bring the ingredients together.
  4. Add 422g of all-purpose flour, 285g of bread flour, 172g whole wheat flour, and 115g whole rye flour. Mix until incorporated and no dry flour bits remain. 
  5. Cover and leave to rest and strengthen for 30 minutes. This is a modified autolyse; the traditional French technique calls for the flours to be hydrated before adding the leavening agent and salt in order to create a stronger, more extensible dough, but the modified version, where you mix the flour, water, and pre-ferment together and let it rest before adding the salt, is well-suited to sourdough breads because a fair amount of their hydration is in the levain.
  6. After 30 minutes, dissolve 22g of salt in the 50g of remaining water and work the solution into the dough by pinching and folding (or mixing on a low speed).
  7. Cover and let rest and absorb for 30 more minutes.
  8. Perform a series of four folds on your dough by grabbing one side of the dough, stretching, and folding it over to the middle of the dough mass. Rotate and repeat in the three remaining directions.
    1. Tip: When washing your hands before your folds, don't dry them fully. Wet hands stick less to highly hydrated dough.
    2. Tip: Watch my demo!
  9. Cover and let rest for 30 minutes and then repeat, continuing at 30-minute increments over 2.5 hours, for 5 subsequent folds. 
    1. Tip: For easier dough handling while shaping, added fermentation time (which leads to more of the traditional tangy sourness of sourdough), and more flexibility with your schedule, you can move the dough to the fridge after the final fold for a cold, long bulk ferment for 8-16 hours. Just make sure your bowl is covered well with a tight-fitting lid or cling wrap to ensure a skin doesn't form on top.
Shape
  1. Let your dough relax for 30 minutes after the final fold or simply pull your retarded dough out of the fridge before beginning the shaping process. Sprinkle your bannetons with rice flour if using and keep them or your parchment-lined bowls close by. Dust a clean, dry surface with all-purpose flour and turn your dough out onto it, patting and gently tugging the edges to form a loose, extensible rectangle.
    1. Tip: Keep your hands dry and dough-free. Any moisture or dough remnants will cause the dough to tear, snag, or stick to your fingers or surface. Use your bench knife to scrape off any bits of dough that get stuck to your counter and then lightly flour the spot. If your hands become gunky, give them a "flour wash," by sprinkling flour over your hands and rubbing them together vigorously to loosen any clingy dough.
  2. Divide the dough into two parts weighing roughly 1 kg each. You can either use your scale or embrace the fleeting opportunity for imprecision in baking and eyeball it. 
    1. Tip: Your dough may not exactly weigh 2kg, because of the weight lost each time you mix and fold the dough and scrape bits of the dough of your hands. Don't sweat it!
  3. Take one half of your dough and begin shaping by stretching out each corner and folding it in to the center to create a package of dough. Then, fold the dough in half, leaving the smooth side face up. Cup the dough with both hands, your pinkies pressing against the countertop and under the bottom of the dough mass, and pull the dough back toward you. You should feel and see the surface of the dough become more taut. Rotate the dough 90 degrees and repeat until you have a smooth boule, stopping before the dough tears from overwork.
    1. Tip: Watch my demo! (But feel free to ignore the pre-shape, which I have since deemed inessential.)
  4. If using a banneton, place the boule inside the basket with the smooth side facing down and the seam facing up. If using parchment-lined bowls, place the boule with the smooth side facing up and the seam face down for an easier transfer when you're ready to bake.
  5. Repeat with the second half of your dough.

Proof
  1. Cover your boules with a clean dishtowel and leave them in a warm place to proof (usually for about 90 - 120 minutes).
    1. ​​Tip: You can also move your boules to the fridge for a long, cold final rise after shaping, for anywhere from 8 to 24 hours. This helps if you're a beginner who's uncertain of how to gauge how proofed your dough is, and also makes it much easier to transfer and score the dough.
  2. About a half-hour before your bread is fully risen, move your dutch oven, baking steel or pizza stones, and/or steam-making device into your oven and pre-heat it to 450. If only baking one at a time, move your second boule into the fridge. If using a steam-making device (like an old cast-iron or oven safe pan) without a dutch oven, put some water on to boil.
    1. Tip: Err on the side of less proofed, as extra preheating time is better than a wobbly, overproofed boule. If it looks like your dough is fermenting too quickly, move it to your fridge while the oven continues to preheat. Your dough should spring back when you prod it, but not be too voluminous or bubbly.
Bake
  1. When your oven is heated and dough proofed, transfer your boule(s) into your dutch oven(s), score the surface quickly and confidently with a well-sharpened knife or razor blade, place the cover back on the dutch oven, and return it to the oven. Scoring allows steam to escape while the loaf is baking to controls its rise and maintain its shape. If using a baking stone or steel, you'll want to score the boule before it goes into the oven, either using a peel or parchment paper to transfer it to the oven after scoring. If using a cookie sheet, simply transfer the boule onto the sheet, score it, and load it into the oven.
    1. Tip: Watch my demo!
  2. If you're not using a dutch oven, you'll want to create additional steam inside the oven to allow the boule to continue rising before the crust sets. With proper gear and a very careful hand, pour about an inch of boiling water into the preheated steam-making device. It will create a cloud of steam immediately on contact.
    1. Tip: If using a steam-making device in a glass-fronted oven, remove the preheated receptacle and pour in the boiling water on your stovetop rather than in the oven before transferring it back to the bottom of your oven. Better safe than sorry, as sudden and high temperature changes on glass can make it shatter.
  3. Close the oven door and bake for 20 - 25 minutes.
  4. After about 25 minutes, take off the lid of the dutch oven or remove the steam-making agent and rotate your loaf. If you're baking one boule at a time, you can carefully transfer the parbaked boule onto your oven rack or a heated baking stone/steel, if the crust is set enough. Then, you can score and load your second boule, repeating steps 1 and 2 as necessary.
  5. After an additional 20 - 25 minutes, check your bread and remove it when the crust has reached your desired darkness. To test its doneness, rap the bottom of the loaf and listen for a hollow sound or take its temperature. It should read at least 200 degrees Fahrenheit.
  6. Leave to cool for at least two hours to allow the inside structure to fully set, and then dig in! 

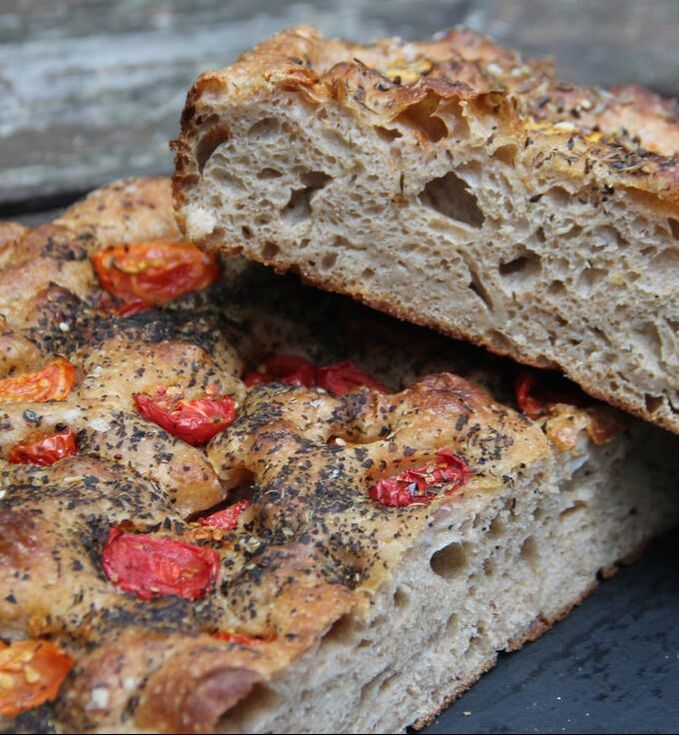
If you give the recipe a try, I'd love to hear how it goes! Let me know in the comments or on Instagram by tagging @jennycstarrs or using #starrssourdough!
View this post on Instagram

A post shared by Jenny Starrs (@jennycstarrs) on Oct 27, 2020 at 10:47am PDT

View this post on Instagram

A post shared by Jenny Starrs (@jennycstarrs) on Jun 16, 2020 at 8:57am PDT

View this post on Instagram

A post shared by Jenny Starrs (@jennycstarrs) on Jun 20, 2020 at 1:55pm PDT

View this post on Instagram

A post shared by Jenny Starrs (@jennycstarrs) on May 13, 2020 at 10:32am PDT

1 Comment

Sourdough focaccia

8/28/2020

0 Comments

 
Picture
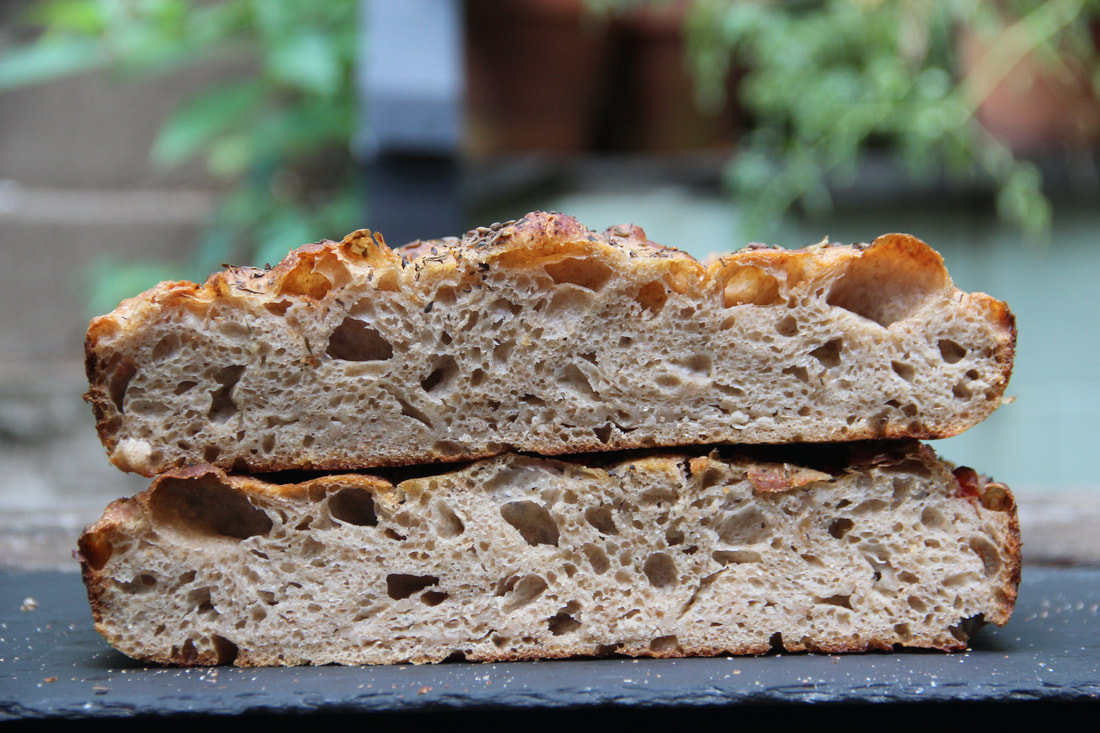
SOURDOUGH FOCACCIA RECIPE

This is such a simple, forgiving, and adaptable recipe that I very nearly brushed off writing it up. Focaccia is a pleasure for me to make because of its versatility and variability. Savory or sweet; two-day fermented or same-day baked; in a round or spread out in a pan; it's going to be delicious just about any way. I'll note the plentiful options and side-routes you can take in the process along the way!

This recipe yields one full pan (approx. 9 x 13 in) of focaccia or two rounds (approx. 10 in diameter) of focaccia, and can be topped with just about anything you desire.

Tip: Make sure your toppings are sliced thinly, or else they can weigh down the focaccia and lead to soggy pockets. My current favorites include coarse sea salt, garlic, and rosemary; cherry tomatoes and basil; peaches, herbes de Provence, and goat cheese; and pesto and nuts.
LEVAIN*
  • 40g mature sourdough starter
  • 160g water
  • 160g bread flour (I use King Arthur Baking's Sir Lancelot flour)

*You can skip this step and use ripe sourdough starter at your normal 1:1 ratio or even a meld of overfermented discard and ripe sourdough starter.

FINAL DOUGH
  • 680g water
  • 505g all-purpose flour (​I use King Arthur Baking's Sir Galahad flour)
  • 360g levain (or starter/discard, as noted above)
  • 230g whole wheat flour (​I use freshly milled flour from Castle Valley Mill wheat grains or No. 18 hard wheat flour from Migrash Farms)
  • 18g salt
  • Approximately 25 - 50g olive oil, for drizzling

EQUIPMENT
  • Medium bowl + lid or towel
  • Large mixing bowl + lid or towel
  • Scale
  • High-sided pan or baking sheet OR two cake rounds or high-sided cast iron skillets
  • Parchment paper
Picture
Picture
SOURDOUGH FOCACCIA: TOTAL FORMULA BAKERS PERCENTAGES
Ingredient
Weight (g)
Percentage
Water
840
92
All-purpose flour
505
55
Whole wheat flour
230
25
Bread flour
160
18
Sourdough starter
40
4
Salt
18
2
----
----
----
TOTAL
1.793 kg
​196
SOURDOUGH FOCACCIA PROCESS
​

Mix
  1. Mix your levain approximately 8 hours before you intend to mix your final dough, and roughly a day before you want to eat your focaccia, by dissolving 40g of mature sourdough starter in 160g of cool to room temperature tap water in a medium or large bowl. Mix in 160g of bread flour and leave to rise at room temperature, loosely covered. (I usually do this the night before mixing and let it ferment overnight if I intend to bake the same day that I mix. If intending to let the final dough rise in the fridge overnight, I usually mix the levain in the morning on the day before I intend to bake.)
  2. When the levain has shiny bubbles on top and has at least doubled in size, it's ready for your final mix. In a large mixing bowl (or in the same bowl if you used a large one to build your levain), add 520g of water to your levain and mix until milky. Measure out 505g of bread flour, 230g of whole wheat flour, and 18g of salt and mix with the wet ingredients to combine. The dough will be very hydrated and feel gloopy. 
  3. Let rise for 3 hours at room temperature, with intermittent folds for strength. It will still feel very loose and slick because of the high hydration, but will gain some strength so that the dough holds together rather than tearing when pulled.
  4. If planning to give it an overnight rise, move it into the fridge after 3 hours of fermenting at room temperature and leave it there for about 12 hours. If intending to bake it the same day, let rise at room temperature for another hour.

Final rise
  1. Line your pan or rounds with parchment so that tails of the parchment stick out and are easily grasped. Rub olive oil into any exposed sides and onto the parchment.
  2. Pour the focaccia dough into the pan or the two rounds and gently tug and spread it out so that it spreads to the edges. Let rise for 1-2 hours, so that it is airy and bubbly.

Bake
  1. Preheat the oven to 440 F.
  2. Pour olive oil liberally over the top of the focaccia. Then, using your fingers, firmly press into the dough to leave wells and bubbles in the surface.
  3. Arrange your thinly sliced toppings.
  4. Transfer to the oven and bake for about 45 minutes, rotating halfway through if your oven doesn't heat uniformly. The interior should register at 200 F and the top should be crisp and golden. If using a smaller pan or round than called for, poke the middle with a toothpick to ensure it's baked all the way through, or leave in to bake for extra time.
  5. Let cool for 2 hours before digging in! Store leftovers in a plastic bag for a day or two so that they don't dry out, and then slice and move to the freezer.
0 Comments

Tomato basil sourdough

8/9/2020

0 Comments

 
Picture
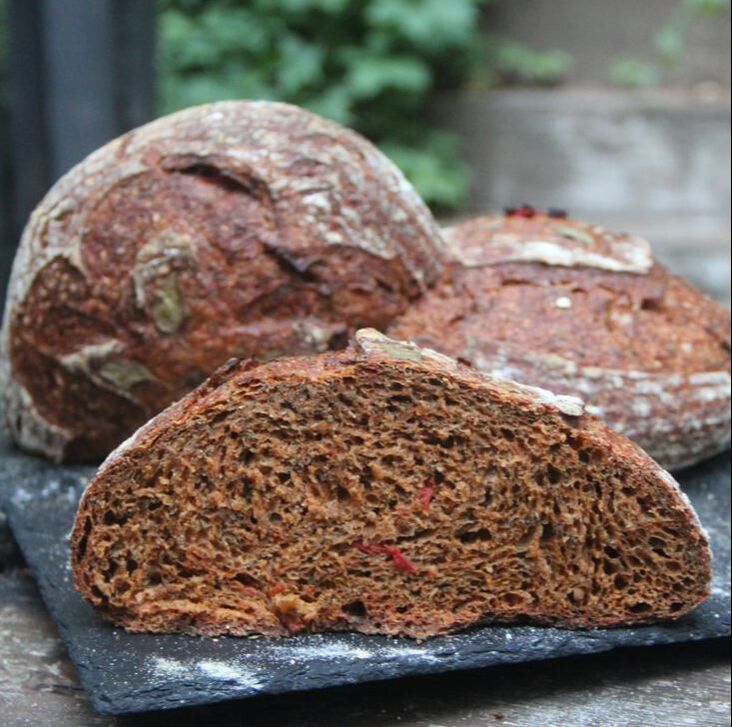
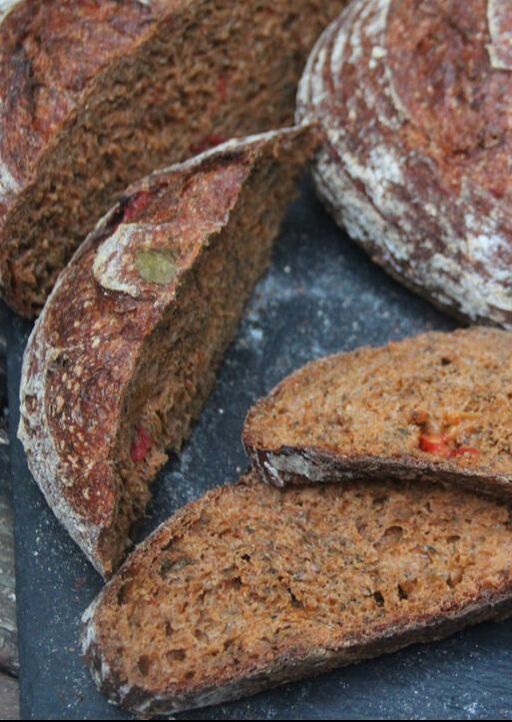
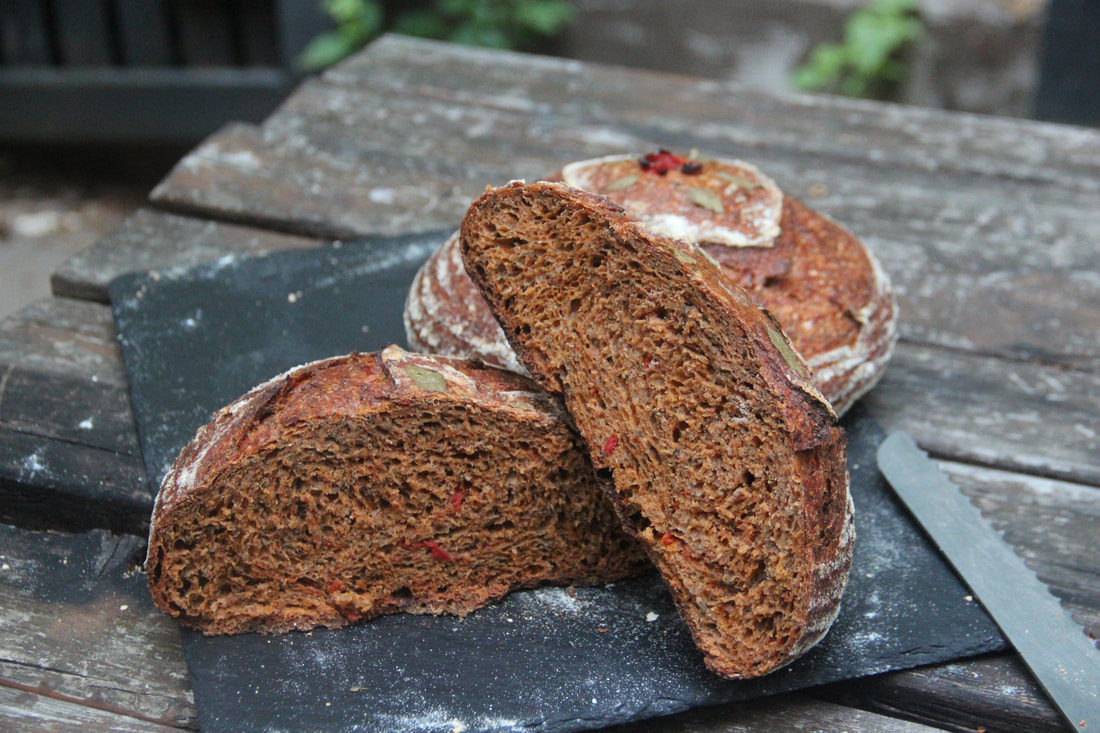
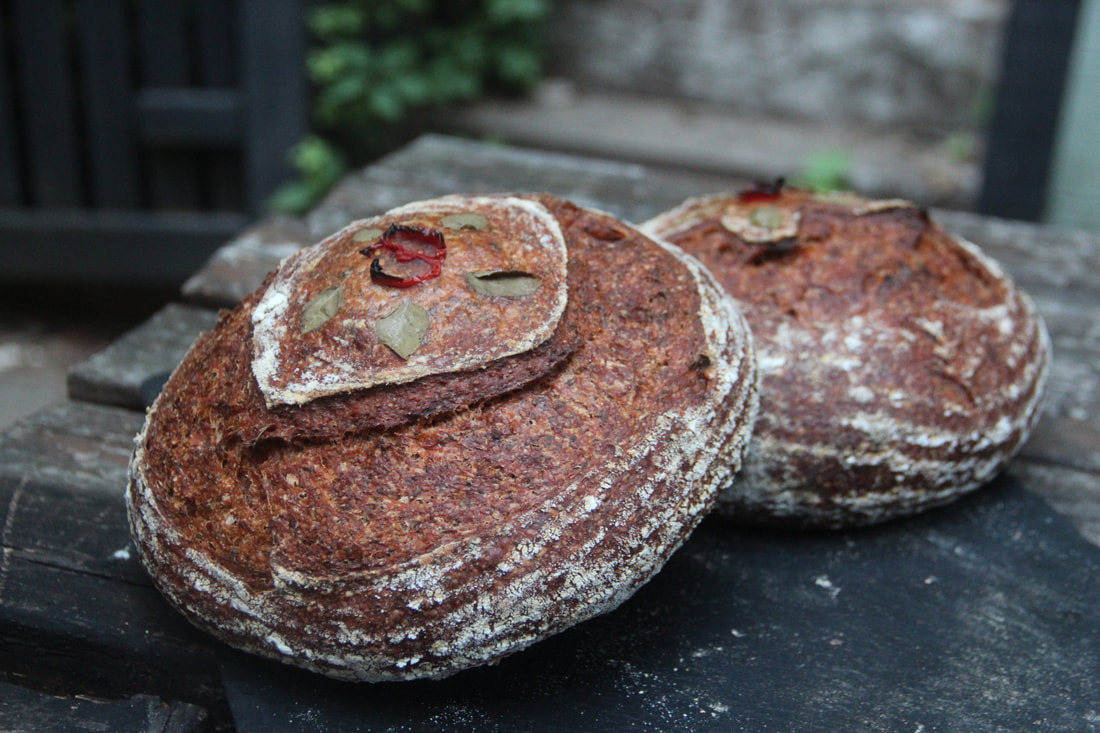
TOMATO BASIL SOURDOUGH RECIPE

This naturally leavened, red-tinged loaf is the epitome of summer. Whole rye gives it a denser crumb and a delicious tang to bring out the acidity of the tomatoes and the freshness of the basil. And paprika gives it a flavorful zing and deepens its natural color. Pair this loaf with some bruschetta or a Caprese salad or even just olive oil and herbs, and you're in for the perfect summer meal.

Recipe yields 2 1-kg loaves.
LEVAIN
  • 120g water
  • 120g bread flour
  • 30g mature starter
FINAL DOUGH
  • 610g bread flour
  • 390g water
  • 305g whole, peeled canned tomatoes
  • 285g whole rye flour
  • 250g levain
  • 100g tomato paste
  • 30g dried basil leaves
  • 20g salt
  • 15g paprika
Picture
TOMATO BASIL SOURDOUGH BAKER'S PERCENTAGES (a universal, slightly more technical way to share recipes that is explained here, but you can also just ignore this)
LEVAIN
100% hydration
100% bread flour
25% mature sourdough starter

TOTAL DOUGH FORMULA
72% bread flour (12% pre-fermented in levain)
50% hydration (12% pre-fermented in levain)
30% whole, peeled canned tomatoes
28% whole rye flour
10% tomato paste
3% sourdough starter
3% dried basil leaves
2% salt
1.5% paprika

​EQUIPMENT
  • ​Two medium bowls
  • Large bowl​
  • Dutch oven, oven-safe pot, or a baking sheet plus cast iron pan or other oven-safe pan
  • Scale
  • Bench knife (optional, but helpful for shaping)
  • Two bannetons (optional, but helpful for proofing)
  • Parchment paper (optional)​
Picture
Picture
TOMATO BASIL SOURDOUGH PROCESS

Mix
  1. Mix the levain 6 to 8 hours before you intend to start mixing the final dough by dissolving 30g of mature starter into 120g of cool water in a medium mixing bowl. Mix the milky solution with 120g of strong bread flour and leave to ferment at room temperature, loosely covered.
  2. When the levain is at its optimal fermentation point, it will have doubled in size and have bubbles pushing up out of the surface, but will not yet have started to recede in volume. Once it's ready, dissolve 250g of the levain into 390g of cool water in a large mixing bowl. You can set the rest of the levain aside to use as discard, or save it to perpetuate your original starter.
  3. Add 305g of the whole, peeled canned tomatoes and 100g of tomato paste and mix well, breaking apart the tomatoes with your hands as you mix.
  4. Sprinkle 30g of dried basil leaves, 20g of salt, and 15g of paprika over the solution and give it a stir to evenly distribute the spices before adding 610g of bread flour and 285g of whole rye flour and fully mixing to combine. The high percentage of rye will make the dough feel a little sticky, but resist adding extra flour unless the mixture isn't coming together in a cohesive mass.
  5. Once thoroughly mixed, leave the dough to bulk ferment for four hours, performing two sets of stretch and folds one hour and three hours after the initial mix.
Shape
  1. After four hours of bulk fermentation, the dough should feel stronger (more elastic) and have risen about 50 percent. Turn it out onto a well-floured surface and divide into equal 1-kg rectangular pieces using a bench knife or other cutting tool, and then pre-shape the dough by extending each of the four corners of the dough and folding them toward the center to form an envelope-style package, with the seam facing up, and then roll one edge over the other and leave to rest, smooth-side up, for about 15 minutes. This gives the dough time to relax before the final shape into a boule. Repeat with the other dough portion. While the dough is resting, liberally flour two bannetons or parchment-lined bowls for the boule to proof in before baking.
  2. Once the dough has loosened and relaxed, scrape most of the flour off of your surface and flip the pre-shape over so the seam-side  is up. Working decisively and confidently, fold the edge closest to you over on itself, rotate the dough about 90 degrees (seam-side up), and repeat. Then, cupping your hands under the boule, pull back under the dough slightly to create surface tension, stopping if the dough tears or sticks to the table. If using a banneton, carefully deposit the boule seam-side up in the floured wicker basket. If using a parchment-lined bowl, gently transfer it so that the smooth-side is facing up. Repeat with the other pre-shape.
  3. Let the boules proof for about an hour at room temperature before moving them into the fridge to retard for 12 to 18 hours, depending on your schedule. You can also skip the cold final rise and bake them the same day.
Bake
  1. Preheat your oven to 450 degrees for 40 minutes, with your baking vessel(s) (dutch oven or oven-safe pot) inside to also preheat.
    1. If you do not have a pot or dutch oven, place a steam-making agent, like a cast iron pan (never glass), onto the bottom rack of the oven about 20 minutes into the pre-heat and boil enough water to cover about an inch of the bottom. 
    2. If you only have one pot or dutch oven, move one boule into the fridge to bake after the first.
  2. Remove your baking vessel(s) from the oven and transfer your boule(s) in, either carefully flipping them out of the banneton so the smooth, lined side is face-up, or lifting the edges of the parchment and depositing the parchment and boules into the bottom of your baking vessel. Cover and place in the oven.
    1. If you do not have a pot or dutch oven, you can transfer the boules to a baking sheet, leaving ample room between them, since dough likes to grow together. After transferring the baking sheet to the top rack of the oven, carefully remove the steam-making agent and pour the boiling water in, away from any glass oven doors or exposed skin, as it will hiss and steam immediately. Pour in about an inch of water and return to the bottom rack of the oven.
  3. Bake, covered/with steam, for 20-25 minutes, then remove the lid(s) and/or steam agent.
  4. Bake uncovered for 20-25 more minutes. The bottom of the boule should sound hollow when tapped, and have an internal temperature of 200 degrees.
  5. Remove from the baking vessel, repeating steps 2-4 for the second boule if needed, and let them cool for at least 3 hours before slicing, and for 6-8 hours for optimal crumb to prevent the high rye percentage from making the interior gummy.
0 Comments

Sourdough banana muffins with walnuts and cinnamon streusel

5/31/2020

0 Comments

 
Picture
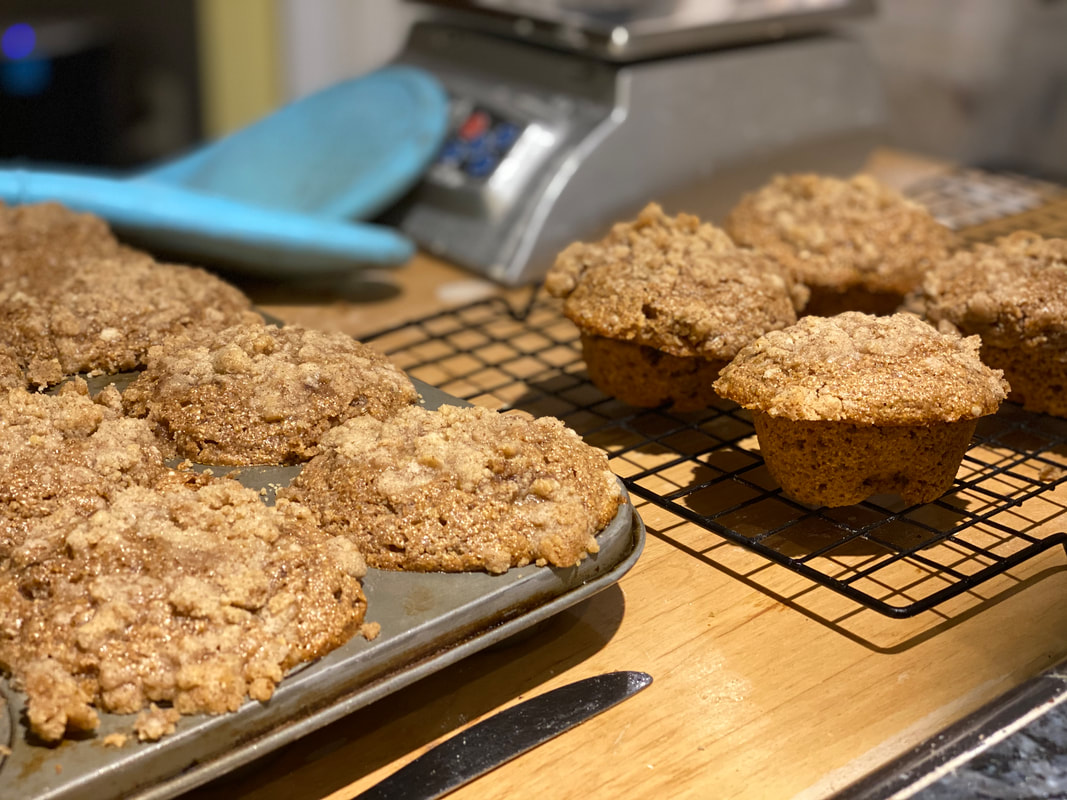
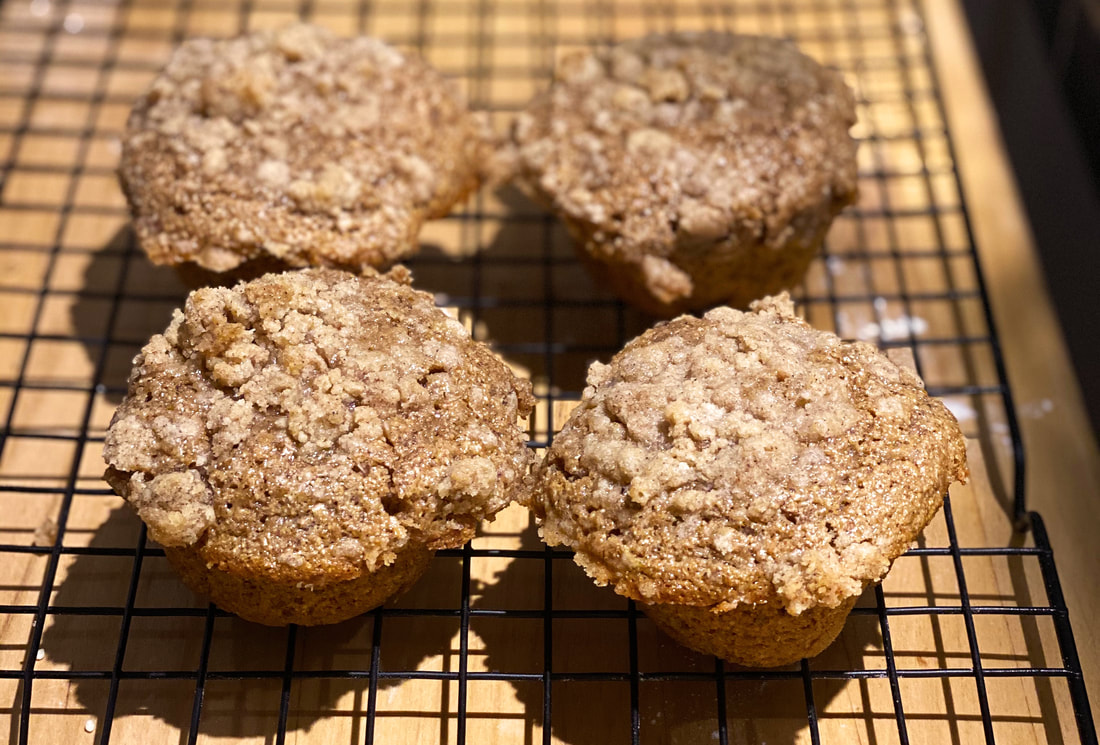
SOURDOUGH BANANA MUFFIN RECIPE

The two constants in my kitchen are overripe bananas and excess sourdough starter. I prefer banana muffins to their denser companion, banana bread, which I always struggle to cook through. Plus, these are easy to freeze and then thaw individually when you need a sweet treat for breakfast!

Recipe yields 12 muffins.

MUFFIN INGREDIENTS
  • 3 overripe bananas (about 400g)​
  • 4 tablespoons (60g) melted butter
  • 1/4 cup (60g) yogurt or sour cream (or more butter)
  • 1 cup (250g) ripe sourdough starter
  • 2 eggs (about 100g)
  • 3/4 cup (175g) brown sugar
  • 2 cups (225 - 275g) whole wheat flour*
  • 2 tsp baking powder
  • 1 tsp baking soda
  • 1 tsp salt
  • 1 tbsp cinnamon
  • 1/4 tsp nutmeg
  • 1/4 tsp cloves
  • 1/4 tsp allspice
  • 1/2 cup (125g) walnuts

STREUSEL INGREDIENTS
  • 4 tbsp (60g) melted butter
  • 3/4 cup (95g) all-purpose flour
  • 1/2 cup (115g) brown sugar
  • 1 tbsp cinnamon

​For a dairy-free alternative, replace the butter and sour cream with vegetable oil, and use 1/2 cup honey in the streusel instead of the butter and brown sugar.

SOURDOUGH BANANA MUFFIN PROCESS
 
  1. Preheat the oven to 350 degrees Fahrenheit and grease or line your muffin tin.
  2. To start the muffin batter, mix together the flour, spices, salt, baking powder, and baking soda in a separate bowl.
  3. Mash up the browned bananas in a medium to large mixing bowl. Using a fork works just fine!
  4. Add the butter, sour cream or yogurt, brown sugar, sourdough starter, and eggs to the mashed bananas, and mix thoroughly if mixing by hand, or for 1 1/2-2 minutes if in a mixer.
  5. Mix in the dry ingredients until no dry bits remain.
  6. Fold in the walnuts.
  7. To start the streusel topping, mix together the flour, brown sugar, and cinnamon.
  8. Add the melted butter and mix together with a fork until chunks of streusel emerge. If it's too paste-like, add more flour, starting with 1 tsp and working your way up in small increments. If it's too dry, do the same with more melted butter.
  9. Ladle the muffin batter into your pre-greased or lined pan, filling nearly to the top.
  10. Sprinkle the streusel liberally on top.
  11. Bake for 18 - 22 minutes, checking halfway through to spin the pan if your oven is anything like mine.
*Updated on 6/13: home-milled whole wheat flour is much lighter than store bought, so this range was updated after some more recipe testing with both kinds of whole wheat flour.
0 Comments

Olive, herb, and spelt sourdough

5/15/2020

0 Comments

 
Picture
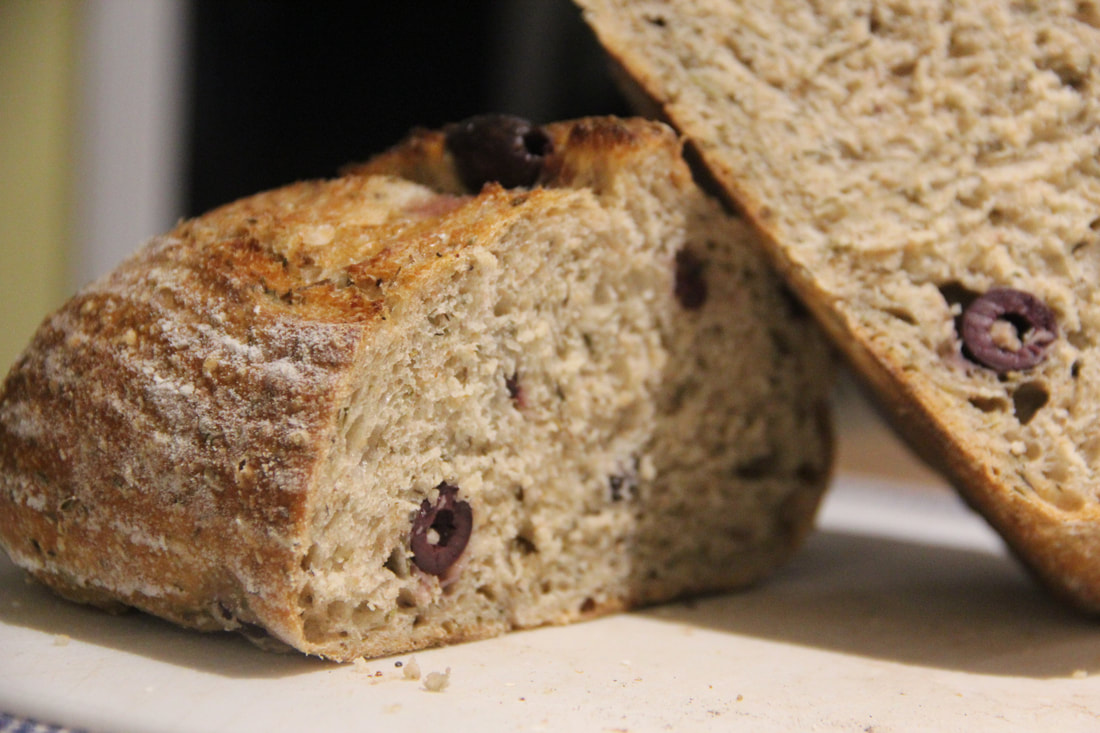
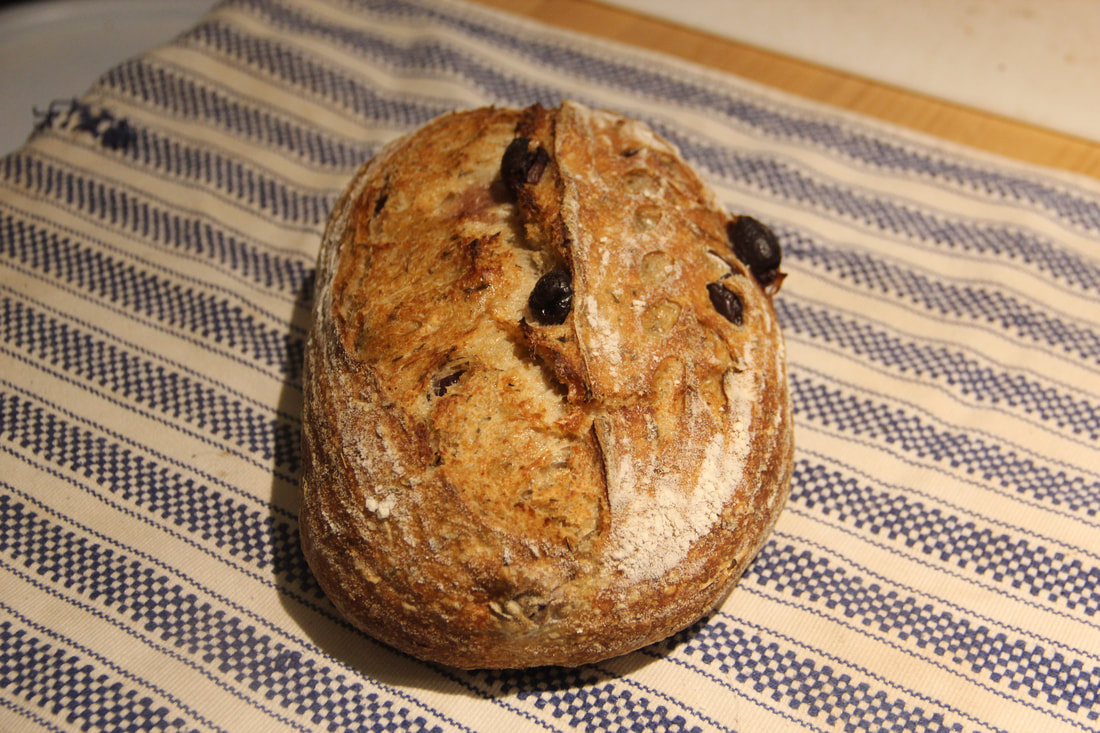
OLIVE AND HERB SOURDOUGH RECIPE

This olive and herb sourdough is packed with salty, herby flavor, plus a subtle nuttiness from whole spelt flour. It even entranced me, a firm olive hater. I'm still far from an olive advocate, but after baking this bread for my olive-loving partner for a few years now, I finally see the merits of this briney fruit.

LEVAIN
  • 15g ripe sourdough starter
  • 30g wholegrain rye flour (I use Migrash Farm's Rye No. 18 or home-milled rye from Castle Valley Mills; can be substituted for wholegrain wheat flour of bread flour, if needed)
  • 30g bread flour
  • 60g water

FINAL DOUGH
  • 135g levain (from above)
  • 260g water
  • 265g bread flour (I use a mix of King Arthur's Sir Lancelot and Migrash Farm's Hard Redeemer Wheat No. 60)
  • 110g wholegrain spelt flour (I use home-milled spelt from Migrash Farms; this can be substituted with wholegrain wheat flour or bread flour, if needed)
  • 110g rinsed and pitted olives (Use your favorite variety or varieties; I use Kalamata or Picholine or a mix of the two)
  • 10g herbes de Provence (or a blend of savory, thyme, rosemary, basil, tarragon, marjoram, and oregano)
  • 7g salt (non-iodized kosher or sea salt is best)

OLIVE AND HERB SOURDOUGH BAKER'S PERCENTAGES (a universal, slightly more technical way to share recipes that is well explained here, but you can also just ignore this)

​LEVAIN
100 percent hydration
50 percent rye
50 percent bread flour
25 percent ripe starter (aka 1:4 ratio)

TOTAL DOUGH FORMULA
73 percent hydration (15 percent pre-fermented in levain)
67.5 percent bread flour (7.5 percent pre-fermented in levain)
25 percent spelt flour
25 percent olives
7.5 percent rye flour (pre-fermented in levain)
2 percent herbes de Provence
1.5 percent salt

EQUIPMENT
  • Medium bowl
  • Large bowl
  • Dutch oven, oven-safe pot, or a baking sheet plus cast iron pan or other oven-safe pan
  • Scale
  • Bench knife (optional, but helpful for shaping)
  • Banneton (optional, but helpful for proofing)
  • Parchment paper (optional)

OLIVE AND HERB SOURDOUGH PROCESS

MIXING

Evening
  1. Weigh out 15g of ripe sourdough starter in a medium bowl.
  2. Add 60g of water (room temperature or slightly chillier), 30g of wholegrain rye flour and 30g of bread flour, and mix well.
  3. Cover loosely with a lid or tea towel, and let rise at room temperature overnight (about 8 hours) in a cool spot.

Morning
  1. In a wide bowl (or in a mixing bowl, if you have both a mixer and a dough hook), weigh out 260g of water. Your levain should have some nice air bubbles, have doubled in size, and pass the float test. Scrape your levain into the bowl and break it up in the water. 
  2. Weigh out 265g of bread flour, 110g of wholegrain spelt flour, and 7g of salt, and add to the bowl. 
  3. Mix together thoroughly, until all the flour is hydrated and there are no clumps remaining. You can perform a series of "slap and fold" kneads in the bowl to give the dough some initial strength.
  4. Perform a set of folds in your bowl by grabbing the underside of the dough, stretching it out one way (but not allowing it to tear), and folding it over on itself. Rotate the bowl and do this in each direction for a total of four folds. Cover the bowl and let rest for 1 hour.
  5. Sprinkle 10g of herbes de Provence and 110g of olives over the top of your dough, and work them into the dough by squeezing gently and performing a set of folds. Let rest for 1 hour.
  6. Repeat the folds two more times, over two more hours. Over the course of the folds, the dough should become stronger, more elastic, and smoother. If it still seems floppy or too sticky, increase your final folds to four instead of two, at 30-minute intervals instead of 1-hour intervals.
Afternoon
  1. Four hours after you mixed your dough, and one hour after your last set of folds, flour your countertop or table to begin shaping.
  2. Preshape your dough by gently pressing down on the dough and stretching it into a rectangle. Stretch out a corner of the dough and fold it into the center. Use a bench knife to scrape the dough off the surface if it's sticking, and reflour. Repeat with each corner, until you have a little package of dough, and then roll it over. Let it rest for 10-15 minutes.
  3. Final shape your dough into a batard, first by turning the preshape over so the smooth, floured side is facing down and brushing off excess flour. Lightly press the dough out into a rectangle, and fold the bottom two corners up and into the center, like a bicycle seat. Roll/fold the dough over on itself, starting with the slimmer bottom and working up to the far end. Tuck the outer tails in and stitch up the seam if needed.
  4. If you have a banneton, lightly flour it (using rice flour is best, but all-purpose will do too; just flour more liberally if using AP) and place the batard into it with the smooth side facing down. If you're using a different vessel or surface for proofing, cover it with a sheet of parchment paper and place the dough on the parchment with the smooth side facing up. Let proof on the counter for 30 minutes to an hour, then store in the fridge for the night or preheat your oven for baking.

BAKING
  1. The next day, preheat your oven to 475 F for 30 minutes. After 30 minutes, place an oven safe pot, Dutch oven, or combo cooker in the oven to preheat for the final 30 minutes, with the lid on. If you don’t have a sufficient oven-safe container, you can put a pot or kettle of water on to boil and place a cast iron pan or other high-heat stable pan (not glass) on the bottom rack of your oven. 
  2. Remove your dough from the fridge and your Dutch oven from the oven. Take off the lid, and, if you used a banneton, turn it over to let the bread slide gently out onto the bottom of the pot or onto the baking sheet. If you proofed your bread on parchment, pick up the sides of the parchment while wearing oven mitts and gently transfer it to your baking surface. Score the top of the loaf with a quick, decisive, and long slash, using a razor blade, a sharp knife, or even a box cutter. 
  3. Place the lid on your pot, if using, and put it into the oven. Without a pot, place the sheet or pan on the second rack of the oven. Carefully pour the boiling water into the cast iron pan to create steam, while wearing oven mitts to protect your hands. 
  4. Bake for 20 minutes, and then remove the lid of your pot or remove your steam-making pan. Bake for 10 minutes, rotate the loaf 180 degrees, and then bake for 10 to 15 more minutes, until the crust is golden and the bottom sounds hollow when tapped. If you have a thermometer, the center of the bread should register a temperature of 200.
  5. Remove the bread from the pot to cool. Wait at least two hours before slicing!
0 Comments

Beginner sourdough

4/19/2020

0 Comments

 
Picture
​BEGINNER SOURDOUGH RECIPE

This is a flexible sourdough recipe for beginning bakers. Feel free to change things around to fit your schedule, pantry, and tastes. You can put your dough in the fridge directly after the bulk fermentation step and shape it later, or bake it directly after shaping and proofing instead of giving it a cold fridge rest. You can substitute all all-purpose flour instead of a portion of whole wheat, or use a meld of grains, like einkorn, spelt, or rye, for the 140 grams of whole wheat that the recipe calls for. Most importantly, get up to your elbows in the dough and feel the magic of sourdough.

Levain
-20 grams active starter
-80 grams water
-80 grams bread or all purpose flour (unbleached)

Final Dough
-180 grams levain
-235 grams water
-235 grams bread or all purpose flour (unbleached)
-140 grams wheat flour (or all purpose if that's all you have on hand)
-9 grams salt

PROCESS

SAMPLE WEEKEND BAKING TIMETABLE
-Thursday evening (between 8 and 10 p.m. - flexible): Take your starter out of the fridge, discard and feed it (keep 30-50 grams of starter and then mix in the same amount of flour and water). Leave the starter at room temperature.

-Friday morning (between 8 and 10 a.m. - flexible): About 8 to 12 hours hours after your morning feeding, repeat the same discard and feeding process.

-Friday evening (between 8 and 10 p.m. - flexible): About 8 to 12 hours hours after your evening feeding, mix your levain. Weigh out 80g of water (no need to be finicky - I use a 5g range) in a separate, mid-sized bowl. Remove 25g of mature starter from your main starter (it should be bubbly and sour-smelling), and put it in the 80g of water. It should float to the top or near the top. Break up the starter in the water, and then add in 80g of all purpose or bread flour. Mix well and leave at room temperature. You can store your remaining starter back in the fridge without feeding again.

-Saturday morning (9 a.m.): In a wide bowl (or in a mixer's bowl if you have both a mixer and a dough hook), weigh out 235g of water. Your levain should have some nice air bubbles, doubled in size, and pass the float test. Scrape your levain into the bowl and break it up in the water. Weigh out your flour, using either 235g of all purpose/bread flour and 140g of wheat flour or simply 375g of all purpose/bread flour, and add to the bowl. Then weigh and add 9g of salt and mix together thoroughly, until all the flour is hydrated. You can perform a series of "slap and folds" in the bowl to give the dough some initial strength, but don't worry too much about kneading. 

Bulk fermentation (9:15 a.m. to 1:15 p.m.): Perform a series of folds in your bowl by grabbing the underside of the dough, stretching it out one way (but not allowing it to tear), and folding it over on itself. Rotate the bowl and do this in each direction for a total of four folds. Cover the bowl with a kitchen towel and leave it for 1 hour, and repeat the folds every hour, so at 9:15, 10:15, and 11:15, for a total of four sets of folds. You can set a timer to remind you, but, again, don't be too finicky. 5, 10, even 15 minutes early or late is fine. During the folds, the dough should transform from a shaggy and sticky mound to an extensible, smooth ball. If it still feels hard to handle at 11:15, add in an extra set of folds at 11:45 and/or double up on your folds, doing two folds in each direction for a total of eight folds. You can also do this if you forget a fold. But it is important to give your dough a rest from folding for the final hour, from 12:15 to 1:15, so that it's relaxed when you go to shape it.

1:15 p.m.: Plop your dough onto a lightly floured countertop. Pick up the edges and make sure they're not sticking to the counter - if so, remove the stuck bits and reflour. Gently press down on the dough, but not so hard that you completely de-gas it. Stretch out a corner of the dough and fold it into the center. Repeat with each corner, until you have a little package of dough. Flip it over and let it rest for 15 minutes. This is called the "preshape."

1:30 p.m.: Return to your preshape for final shaping. Turn the dough over, so that the smooth, floured side is again facing down. Fold the corners in again, and flip the dough over again so that the sealed ends are on the bottom and the smooth side is on the top. With your hands cupping under the farside of the dough, pull the ball back toward you, creating surface tension on the boule. Rotate the dough and repeat until the dough is taut, but not going so far that it tears. If you have a banneton, lightly flour it and place the dough into it with the smooth side facing down. If you do not, then put a sheet of parchment paper into a medium sized bowl and lightly flour it, making sure that you have extra parchment sticking up on the sides of the bowl (this will make the transfer for baking easier!). Place the dough into the parchment-lined bowl with the smooth side facing up. Let rest and rise on the counter for 30 minutes, then store in the fridge for the night.

Sunday (noon): Time to bake! I usually wait until the evening, to give it a longer time in the fridge, but you could speed it up to bake in the morning if needed.

Preheat your oven to 475 for 30 minutes. After 30 minutes, place an oven safe pot, Dutch oven, or combo cooker in the oven to preheat for the final 30 minutes, with the lid on. If you don’t have a sufficient oven safe receptacle, you can put a pot of water on to boil and place a cast iron pan or other high-heat stable pan (not glass) on the bottom rack of your oven. 

Remove your dough from the fridge and your Dutch oven from the oven. Take off the lid and, if you have a banneton, turn it over to let the bread slide out onto the bottom of the pot. Score the top of the loaf with a quick, decisive slash, using either a sharp knife or a razor blade. If you don’t have a banneton, score your bread and then, wearing oven mitts, grasp the sides of the parchment paper with your dough on it and transfer it into your pot. Place the lid on and put it in the oven.

Without a pot, simply place your scored bread on a baking sheet (with parchment or silicon under it so that it doesn’t stick) and put it in the oven on the second rack. Pour the boiling water into the cast iron pan to create steam.

Bake for 20 minutes, and then either remove the lid of your pot or remove the steam-making pan. Bake for 10 minutes, rotate the loaf 180 degrees, and then bake for 10 to 15 more minutes, until the crust is golden and the bottom sounds hollow when tapped. If you have a thermometer, the bread should have a temperature of 200. 

Remove the bread from the pot to cool, waiting at least two hours before slicing!

0 Comments

How to store sourdough bread

4/5/2020

2 Comments

 
Picture
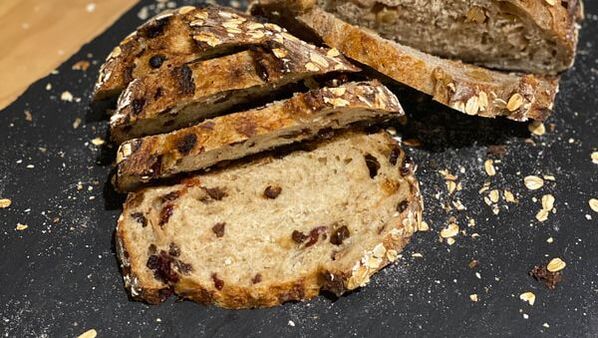
Part of sourdough's magic is its shelf stability and long-last freshness after it's pulled from the oven. So once you've baked or bought a loaf of sourdough, you can maximize its freshness with these storage techniques.
Up to 2 days: On the counter. 
Picture
Sourdough's natural acidity prevents staling and molding far better than yeasted breads. You can store sourdough on your counter or cutting board for up to two days after first slicing into it. A good tactic, both for ease of slicing and storage, is to cut your loaf in half, and then cut slices out of each half rather than from the whole cumbersome loaf.

Then, once you're done sawing off a piece, simply turn the loaf cut-side down on your cutting board or counter surface. This prevents the exposed side from going stale and keeps the thick outer crust from softening.
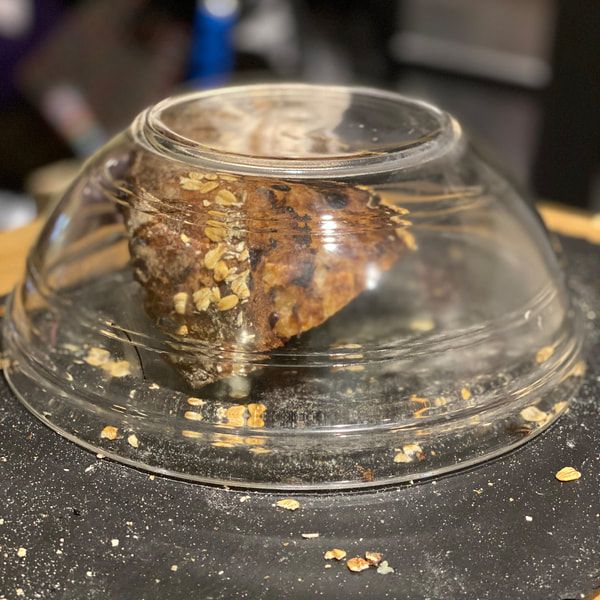
Up to 5 days: Under a bowl
Picture
I came across this method a few years back, and was tickled by its ingenuity. This is basically a makeshift breadbox, fashioned out of a much more accessible bowl. It does minimize airflow to your bread, which can soften the crust. But it's a better storage method than a plastic bag, which traps far more heat and moisture, or longterm open-air exposure, which can harden up your bread far too much to pleasantly gnaw through.

This method works best with a half loaf, again stored with its cut-side down to your counter or cutting board. Simply cover it back up with the bowl every time you slice off a hunk.
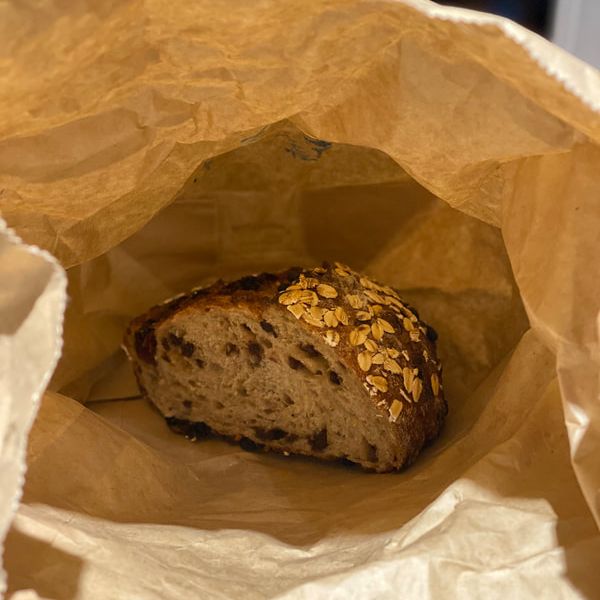
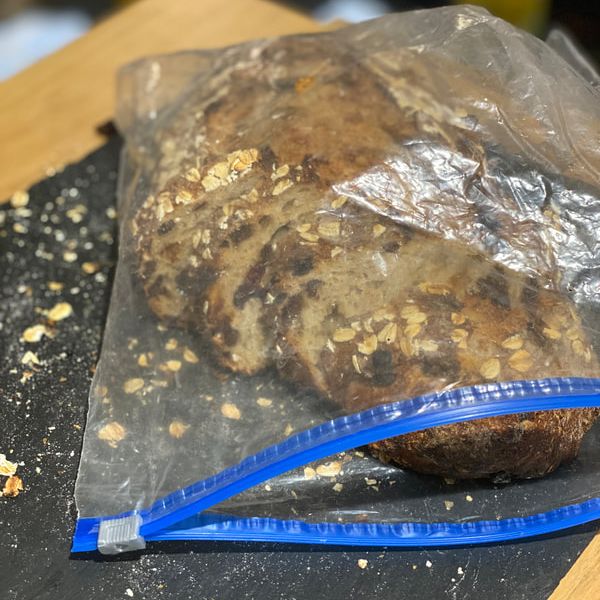
Up to 5 days: In a bag or breadbox
Picture
Picture
Paper or cloth bags are more breathable alternatives to plastic. You could even wrap your bread in foil, a tea towel, or beeswax wraps. And while plastic bags aren't usually a good way to store your bread, they may come in handy in certain drier climates, where you need to retain as much moisture as you can. But in D.C., and especially during D.C. summers, plastic often traps too much humidity.

​​Bread boxes can be very handy if you're an everyday bread eater with plenty of counter space. They come in endless different sizes and materials, and can store multiple whole or half loaves.
Up to 3 months: In the freezer
Picture
My favorite way to store excess bread is to slice it up and store it in the freezer. You can either wrap it tightly in plastic wrap or foil or put it in a plastic bag; just make sure there's no exposed bread and no excess air in the bag, in order to prevent freezer burn and discoloration. Then, you can just pop a slice in the toaster in the morning when you're out of fresh bread.

You can also store whole, unsliced loaves in the freezer. Again, make sure the wrapping is airtight. When you want to thaw your bread, you can move it to the fridge or counter to defrost completely, spritz with water, and rebake in your oven at 300 degrees for 10 to 15 minutes. This refreshes and re-firms the loaf.
Bread storage don'ts
  • Don't pre-slice your bread if you're going to leave it on the counter or in your bread box. That exposes more of its soft interior to air, and hastens the drying and staling processes.
  • Don't store your bread in the fridge. This may seem like it would keep your bread fresh longer, but it actually speeds up the staling process. The dry, cold environment sucks the moisture out of the bread's starches and starts their recrystallization, which hardens the bread.
  • Don't thaw and then refreeze your bread. Bread that has been frozen should be reheated and eaten immediately, for best taste and texture.
  • Don't treat sweetened or enriched breads the same way you do lean, traditional sourdough loaves. If you have a bread like challah, babka, or brioche, you want to encourage more moisture to stay in the bread, so plastic wrappings are actually ideal. Also, these breads will go stale or moldy more quickly than lean sourdoughs.
Saving stale bread
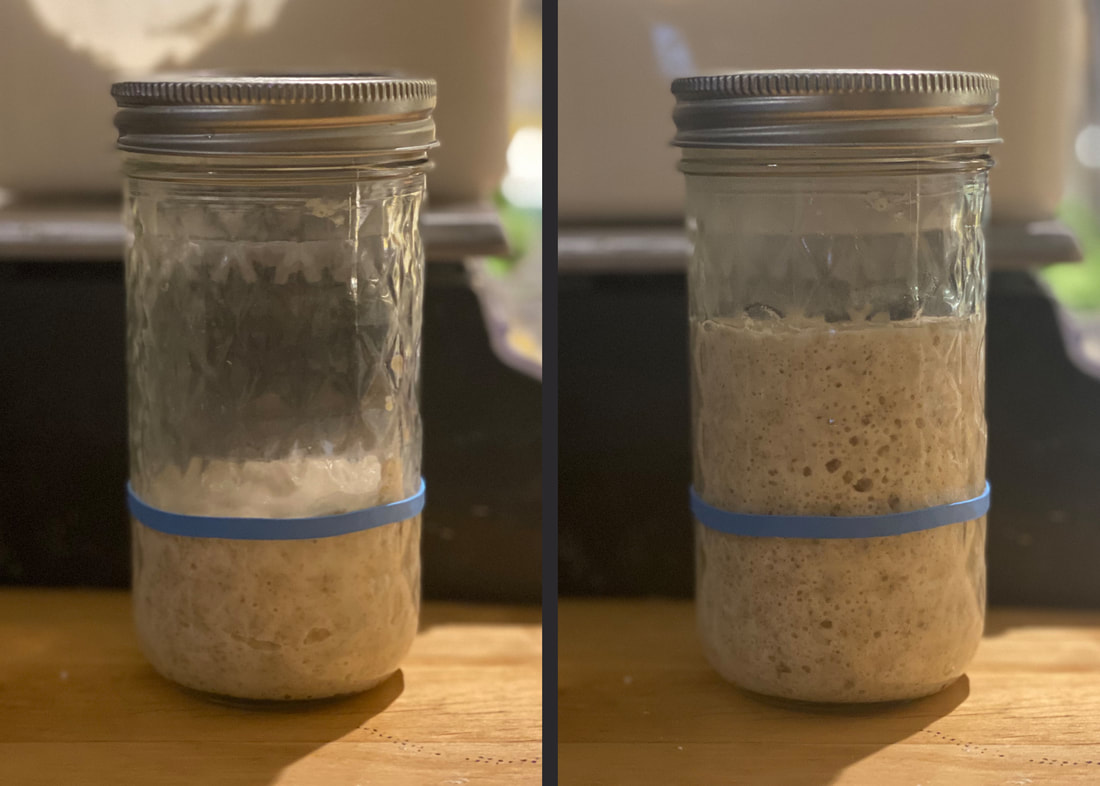
There will come a day when, despite your best efforts, you leave a loaf out too long. But there are still many alternatives to the garbage bin or the compost heap. Bread crumbs, garlic bread, croutons, crisps, French toast, and bread pudding are all excellent projects for stale sourdough. 
2 Comments

How to maintain a healthy sourdough starter

3/23/2020

0 Comments

 
Picture
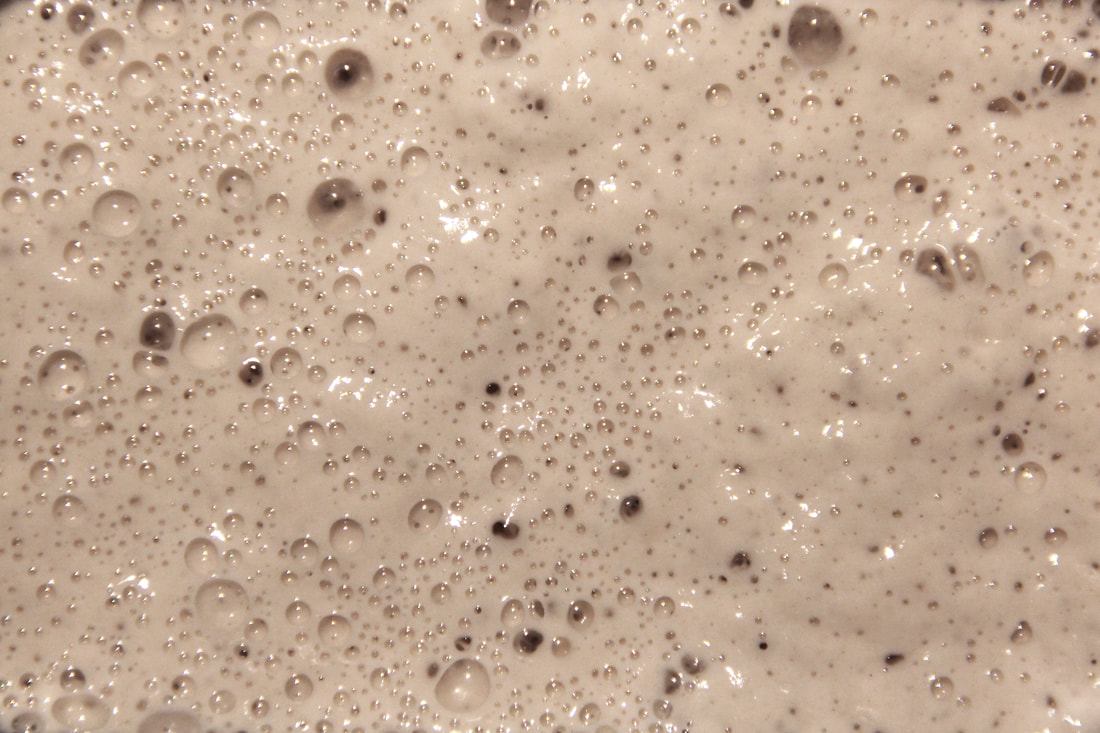
This guide will walk you through maintaining an established sourdough starter. This is handy for folks who want to start baking with sourdough, but aren't ready to coax their own starter to life. You can get a sourdough starter by asking a fellow baker or bakery to share their starter, which is also referred to as a sourdough, mother, or levain. I'm always happy to disperse some of my four-year-old starter to folks in D.C. - leave a comment or send me a note and I'll get you some!

Sourdough is a living culture, similar to Greek yogurt, cultured butter, kombucha, and other fermented products. It’s an intertwined ecosystem of lactic acid bacteria, called lactobacilli, and different strains of wild yeast, and it's maintained with the proper balance of flour, water, air, and time. The lactobacilli breaks down flour and water into starches and sugars while creating an acidic environment that wards off other bacteria and gives the starter its sour tang. The wild yeast feasts on the sugars and produces carbon dioxide as a byproduct, creating the bubbles and rise in the starter. To encourage that natural process, you need to keep your starter cozy, balanced, and fed in order for it to be stable and active for your baking projects.

There are many different ways to create a sourdough starter, and I'll be creating a guide for that soon, too. One of the most intriguing methods I learned about is from Ruth Allman's "Alaska Sourdough," which suggests leaving a pot of potato water, flour, and sugar out until it starts bubbling, while counseling Alaskan frontiersmen to watch their thermometer closely. I created mine in 2016 following the simplest method: air, flour, water, and time. And that’s all your starter needs to stay happy, too.
 
FEEDING YOUR STARTER
Picture
One of the most important steps to keep your starter healthy is knowing when it's ready to be refreshed or fed. A few visual clues are if you can see air pockets through the side of the container, if there are elevated, glistening bubbles on the surface of the mixture, and if its volume has doubled from its original size. Scent-wise, your starter should smell ripe, with a vinegary, yeasty, tangy, fruity aroma.

If the bubbles are small, the volume of the mixture has receded, or it smells alcoholic, your starter is over-fermented and definitely needs to be fed. This happens when the lactobacilli and wild yeast in your starter have consumed all the flour and water available. The lactobacilli starts to get overly acidic and sour, overwhelming the yeast with too much lactic acid and stopping the production of carbon dioxide. Baking with an over-fermented starter or levain will contribute to a stronger sour taste and diminish your bread's rise.

I maintain my sourdough starter at 100 percent hydration, which means it's kept at a ratio of 1 part flour to 1 part water. The reason that's considered 100 percent hydration is because bakers percentages are determined by a formula's flour weight. Here, the water is 100 percent of the flour weight. Thus, 100 percent hydration starter.

If I've given you a sourdough starter, it contains approximately 50 grams of mother starter. To feed or refresh any size starter:
  1. Put 50g of starter in a larger jar or container with enough space for it to expand upward roughly quadruple its current height. Save any remaining starter for other baking projects, or throw away.
  2. Add 50g of water. Break up the original starter in the water, making it milky and frothy. This makes even mixing in the next step much easier.
    1. Many people insist on using filtered or bottled water for their starter maintenance regimen. While baking in Washington, D.C., I've found the tap water here to be just fine. If your water is exceedingly hard or chlorinated, or if your starter seems to be struggling, you may want to try filtered or bottled water. 
  3. Add 50g of flour and mix thoroughly. 
    1. I use King Arthur All Purpose Flour for my standard starter, but you can experiment with other varieties, convert it to a whole wheat starter by using whole grain flour, or try other grains like rye, einkorn, or spelt.​
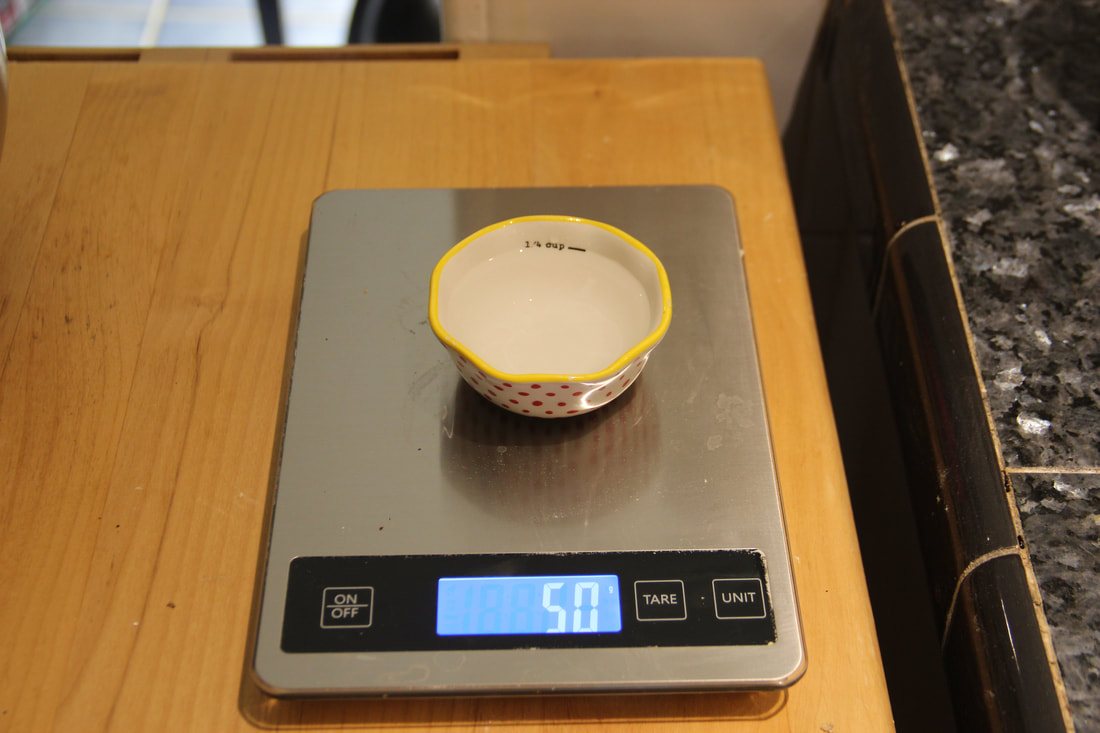
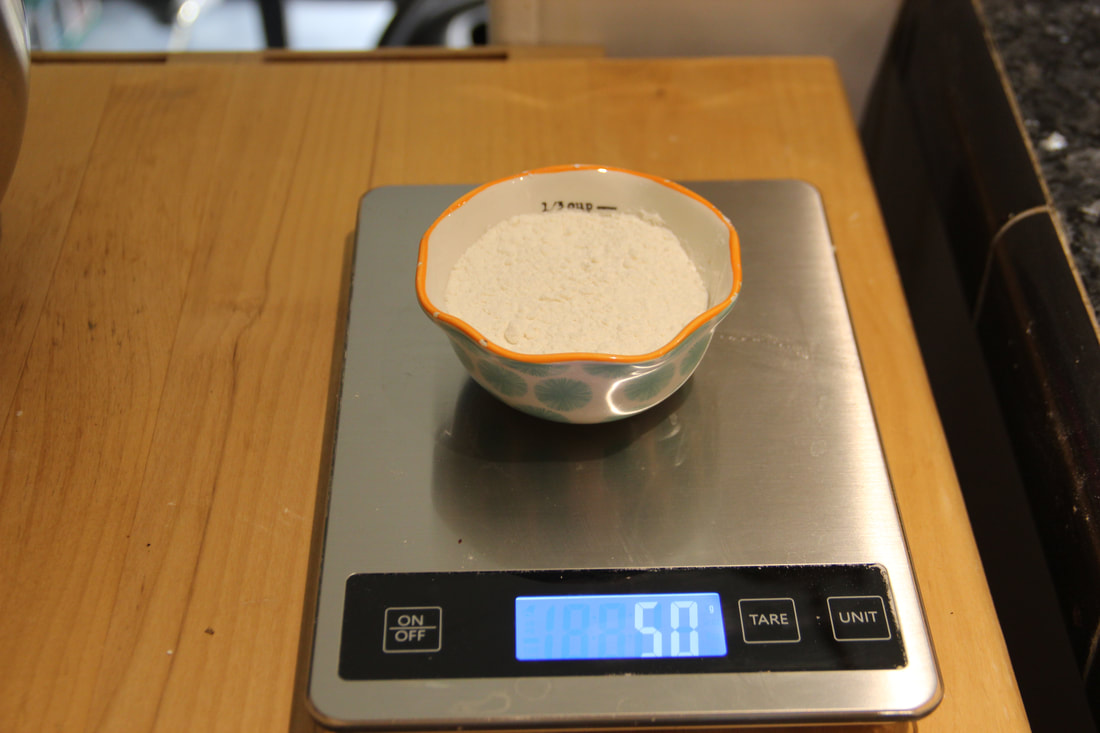
Weighing bread baking ingredients is much more precise than measuring their volume; however, if you don’t have a scale or don’t want one, you can look up rough conversions from grams to cups and use that approximate estimate. 50g of water is about 1/4 cup, and 50g of flour is about 1/3 cup.

Your starter’s activity is greatly influenced by temperature. If your culture is stored in a chillier spot, its metabolism will slow down, taking longer to reach peak fermentation than if it's in a warm location. Use this knowledge to aid your baking process. If you want to speed up its activity, put it near your stove or heater. If you want to slow it down, store it near a drafty window. Just don’t heat it above 110 degrees Fahrenheit, as that will kill off the yeast.

After feeding your starter, loosely secure the lid of its container or cover it with a tea towel in order to allow the carbon dioxide to escape. The culture will start to froth, bubble and expand, letting out gas along the way. It can take anywhere from 5 to 12 hours for the starter to hit its peak — a good rule of thumb is about 8 hours — and then it will begin to recede.

To feed you sourdough starter a second time without building up its mass:
  1. Remove 100 grams of the starter, which is 2/3 of its weight from the prior feeding.
  2. Replenish it with another 50g water and 50g flour, following steps one and two above.
  3. Repeat. Let it rise, remove some, and replenish it again as it needs.

The removed sourdough, which is often called “discard", can be thrown away, used, or saved in your fridge and substituted in to your favorite recipes in place of equal parts flour and water. Some of my favorite uses for discard are Greek yogurt flatbreads, muffins, crackers and pancakes.
Picture
COVID-19 TIP: If you're conserving materials and trying to minimize your discard amount, you can maintain a sourdough starter at a weight as low as 60 or even 30g. If maintaining your sourdough starter at a smaller level, it will need closer attention to ensure it doesn't over-ferment.

FLEXIBILITY TIP: Starters are robust, especially once they're established. Mine has survived forgotten feedings countless times. So don't stress if you wake up in the morning and realize you forgot to refresh it the night before or the whole day before. It should re-establish itself with a few consistent feedings. Just make sure you don't overfeed it to try and make up for the neglect; the bacteria and yeasts still need time to work through the flour and water you feed it before you feed it again. Make sure you see bubbles and expansion before you refresh it again.

SCHEDULING TIP: I've established a routine of feeding my starter once in the morning, around 8 a.m., and once at night, around 8 p.m., when baking with it every day. Putting in place a routine helps you get familiar with your starter's needs and ensures that it won't go too long without a feeding.
BAKING WITH YOUR STARTER
Picture
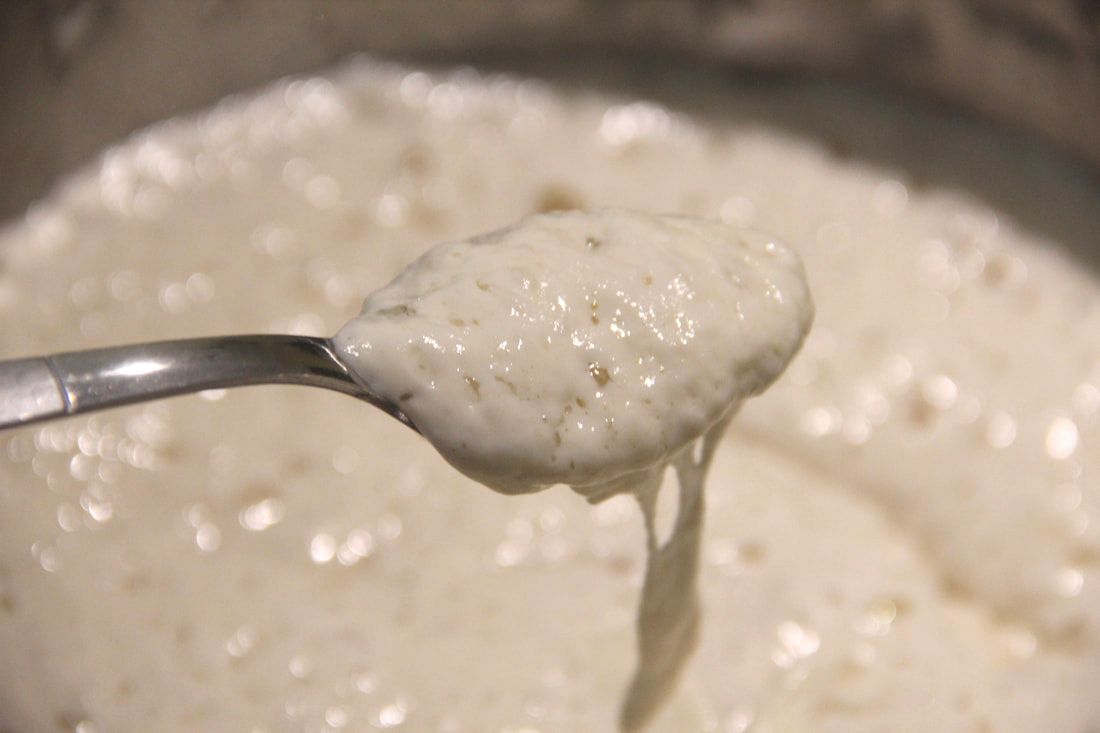
You want to use your sourdough starter at its most active, bubbly level when you're baking, so that means you have to plan ahead. It can take a few feedings to make sure your culture is awake and moving, especially if you store it in the fridge (more on that below). A reliable way to check that your sourdough is primed before you start baking is by using the float test. When you think your starter is at its peak activity level, break off a small piece and drop it into a cup or bowl of water. If it floats, that means it’s ready to use.

If your recipe calls for more than 100g of sourdough starter, then you’ll want to “build” up your starter before you plan to start baking. To do this, you can skip the discard step when feeding your starter, or remove less than 2/3 of its weight before replenishing it in order to make sure you have the right amount of starter before you start baking. And make sure you always have a buffer so that when you're mixing your sourdough starter into your full recipe, you have some left over to keep your starter going.

And some recipes call for a “levain” or “pre-ferment,” which means creating a different mixture of grains and water (and sometimes other ingredients too) with your sourdough starter before baking, rather than using your 100 percent hydration sourdough starter. If so, make sure to save a portion of your original starter in a separate container so that it can live on in its original form.
Picture
SCHEDULING TIP: A schedule I developed for weekend baking projects was to remove my sourdough from the fridge Thursday night and feed it that evening, Friday morning and Friday night, leaving me time to make a levain on Friday night before diving into a recipe Saturday morning. 
 
STORAGE
Picture
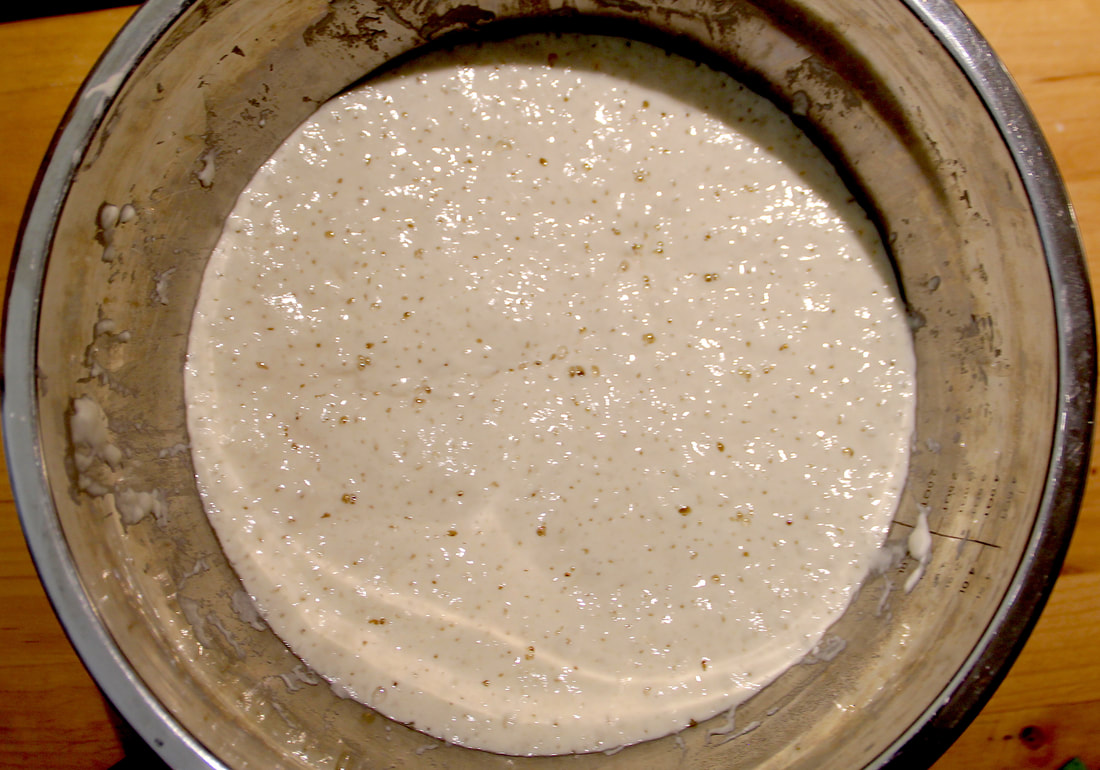
Not ready to bake with your sourdough starter? Make sure the container is covered tightly with a lid and place it in your refrigerator. This will slow down its fermentation to a sluggish pace, letting you take a break from feeding it while you’re not using it. A good rule of thumb is to “wake” it up every week with a fresh feeding and some time at room temperature for the culture to work its way through its new food source, but I’ve brought back my culture after 4 dormant, chilly months before, so don’t sweat it if it lingers there for a few weeks. It will just take more feedings to get back to its normal, active level.
Picture
COVID-19 TIP: One way to minimize feedings but keep your starter active is to feed it once a day, let it rise, move it to the fridge, and then remove it and refresh it the next day. An example schedule for this would be to feed it in the morning at 9 a.m., move it to the fridge at 5 p.m., and then remove it from the fridge at 9 a.m. the next day to repeat. 

SCHEDULING TIP: Establish a routine if storing your starter in the fridge, like always moving it into the fridge at its peak fermentation level. That way you always know that when you remove it from the fridge, it's ready to be fed either right away or when it comes to room temperature.
 
WAKING UP A DORMANT STARTER
Picture
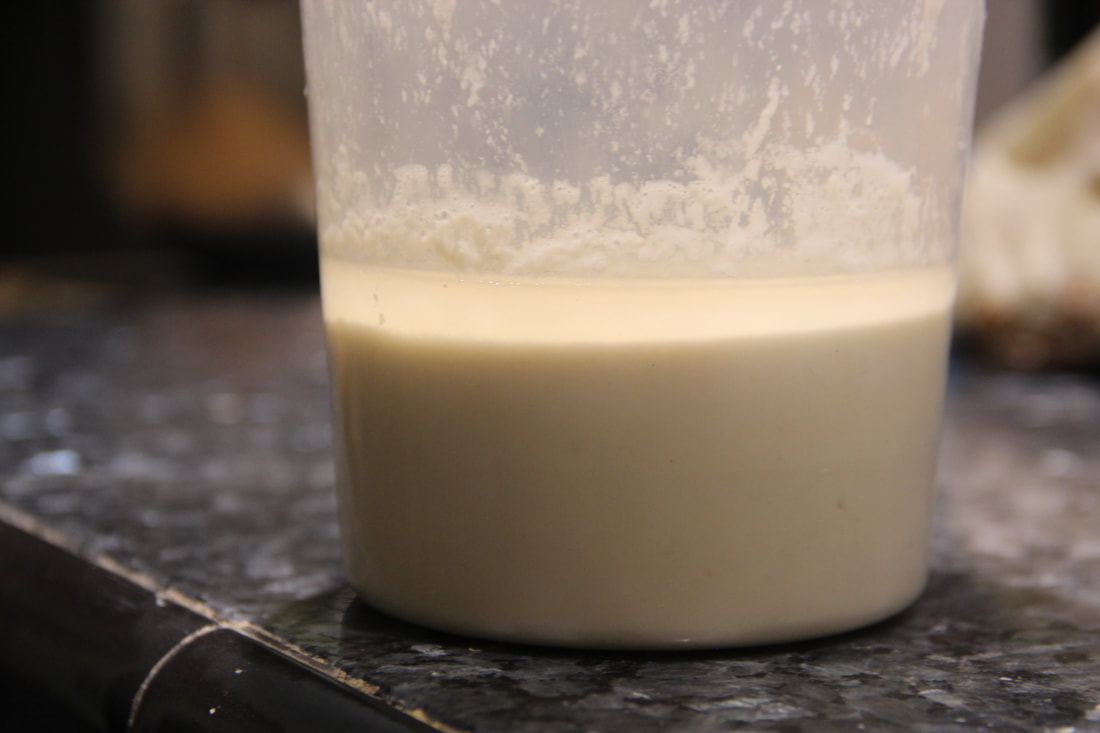
To wake up your starter after it's been stored in the fridge for a week or more, remove it from the fridge and allow it to come to room temperature. This can take anywhere from 1 hour to 4 hours, depending on the size of your starter.

​Don’t be put off if the top has developed a grayish tint, if there’s a layer of liquid gathered on top of the culture, or if it smells particularly alcoholic; just mix it up and feed your starter as outlined in the section above. If it’s any other color, though, be wary. A stable sourdough starter will ward off bad bacteria, but if it’s been severely neglected, it could get infected with harmful organisms. This rarely happens. If it has an orange or pink hue or a fuzzy, moldy surface, throw it away.

Keep refreshing your sourdough 2-3 times a day, until its back to its bubbly, tangy self.
0 Comments

Roggenbrot

3/17/2020

0 Comments

 
Picture
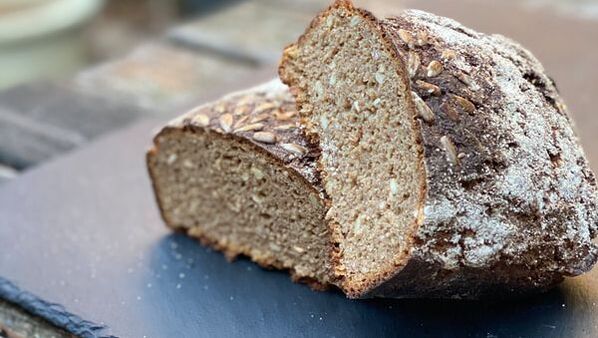
Rye is a magical, fearsome, and wholesome grain. Often grown as a cover crop, it's excellent at preventing field erosion over long winters and is relatively inexpensive for farmers. And rye is delicious for baking, especially when in naturally leavened breads.

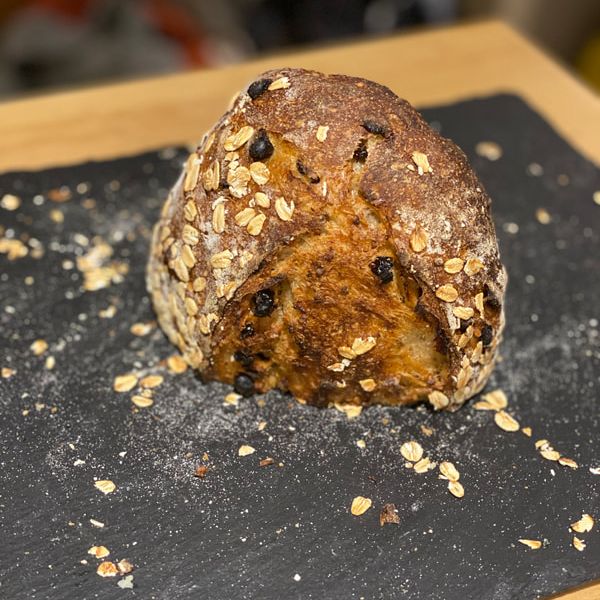
Baking with rye is quite different than baking with wheat, especially in this 100% rye recipe, because of the grains' different chemical compositions. Rye still contains a type of gluten (a prolamin called secalin), but it can't create the same elastic bonds that wheat's gluten proteins (glutenins and gliadins) do. Instead, pentosans (a complex sugar present in rye that is also in wheat, but in lesser amounts) and starches are responsible for rye's crumb structure.

When mixed with water, the pentosans in the rye swell and absorb large amounts of water, while its amalyse enzymes break down starches into sugar. But too much sugar and not enough starch will cause the rye bread's structure to collapse. Bakers refer to this as "starch attack." One way to slow down the enzyme activity and protect rye's crumb structure is to acidify the dough with sourdough starter. Another way is to use scalded, pre-gelatinized rye four as a portion of your dough. This recipe employs both techniques, and was developed for the Starrs Sourdough January 2020 sale.


This is a 100% rye sourdough recipe with whole rye berries and sunflower, flax, and pumpkin seeds, using a rye sourdough starter. If you have a whole wheat or all-purpose wheat flour starter and don't want to make a new whole rye one, you can substitute in your own starter. The final dough won't be exactly 100% rye, but it'll be pretty close! The bakers percentages are listed alongside the ingredient weights, as well as for the total formula.

RECIPE
Yields one 1135-g loaf

Levain
25g rye starter (20%)
125g whole rye flour (100%)
125g water (100%)

Scald
125g whole rye flour (100%)
25g rye berries (20%)
25g sunflower seeds (20%)
25g flax seeds (20%)
25g pepitas (20%)
250g water (200%)

Final mix
250g whole rye flour (100%)
125g water (50%)
10g salt (4%)
(+ 475g scald and 275g levain)

Total formula
500g whole rye flour (100%)
500g water (100%)
25g whole rye berries (5%)
25g sunflower seeds (5%)
25g pepitas (5%)
25g flax seeds (5%)
25g rye starter (5%)
10g salt (2%)


EQUIPMENT
Loaf pan
Three bowls
Mister or cast iron pan
Plastic bowl scraper (helpful, but not required)
Kitchen thermometer (helpful, but not required)


​
PROCEDURE

1) Ensure your rye starter is active and bubbly by feeding it about 8 hours before you begin to mix your levain, and a day before you plan to begin your final mix. I usually feed my starter the morning of the day before I plan to bake.

2) 8-12 hours before your final mix, prepare your rye levain and scald. I usually do this the evening before I plan to bake.
  • Put water on to boil.
  • In one container, mix 25g active rye starter with 125g whole rye flour and 125g cool water until fully combined in order to create your levain.
  • In a separate bowl, mix together 125g whole rye flour, 25g rye berries, 25g sunflower seeds, 25g flax seeds, and 25g pepitas for your scald.
  • Pour 250g of boiling water into the dry scald ingredients and mix thoroughly. The rye flour will quickly gelatinize, making it more difficult to stir as it cools.

3) The next morning, check your rye levain's activity level. When it seems to have reached its full expansion (about double its size when mixed the night before), combine the remaining mix ingredients.
  • Roll up your sleeves, tie back your hair, and prepare for a bit of a mess. This can be done as either a hand mix or in a mixer, but I prefer to do it by hand, as rye doesn't require intensive kneading. But it is an incredibly sticky process.
  • Mix 250g whole rye flour, 125g cool water, and 10g salt with the levain and the scald, breaking up the now-solidified bits of the scald with your hands as you go.

4) Let ferment for 1 - 2 hours.

5) Line or spray a loaf pan and moisten or oil your hands. Then, scoop the dough into the tin and smooth the surface. This is where a plastic bowl scraper comes in handy. Sprinkle extra rye flour on the top of the loaf and place in a warm area.

6) Preheat oven to 500 degrees F. Ready your spray bottle/mister or place your cast iron pan at the bottom of the oven and boil more water about 30 minutes from your bake time.

7) Let bread proof for 1 - 2 hours. Rye doesn't rise anywhere near the same amount as wheat, or feel the same when poked. When the rye flour at the top develops cracks, it's a good indication that the bread is proofed. 

8) Put the bread into the hot oven, and either mist with a spray bottle of water or pour boiling water into the cast iron pan at the bottom of the oven to create steam. Bake for 10 minutes at 500, then drop to 450 for 20 minutes, then 400 for about 30 more minutes. When the bread temperature is over 200 degrees F, remove from the oven to cool.

9) I recommend waiting at least 24 hours before cutting into this dense, nutty, aromatic loaf. Rye can be quite gummy if sliced earlier. It will last a week or more in your bread box or stored in a paper bag.
0 Comments

    Recipes

    Picture
    Sourdough banana muffins

    Picture
    Olive, herb, and spelt sourdough

    Picture
    Beginner sourdough

    Picture
    Roggenbrot
    ​

    Guides

    Picture
    How to store sourdough bread

    Picture
    How to maintain a sourdough starter


           Author

    I started baking sourdough bread in 2016, and was immediately hooked. Since then, I've worked as a home baker, professional baker, and cottage baker, serving up naturally leavened breads and pastries to communities in Washington, D.C., and Alaska, where I'm now based.

    Archives

    December 2021
    February 2021
    October 2020
    August 2020
    June 2020
    May 2020
    April 2020
    March 2020


    Categories

    All
    Banana
    Cookies
    Focaccia
    Muffins
    Pizza
    Rye
    Sourdough
    Sourdough Discard
    Sourdough Starter
    Tomato

Proudly powered by Weebly
  • Home
  • Subscribe
  • Recipes
    • Recipe testing
  • About