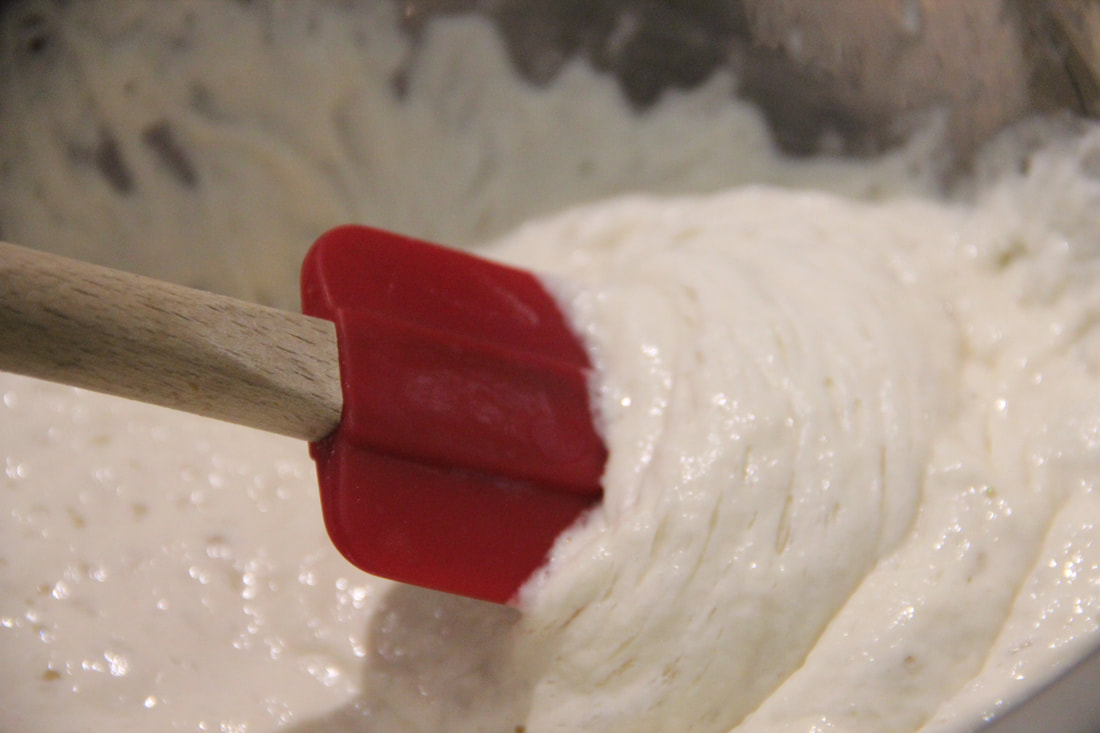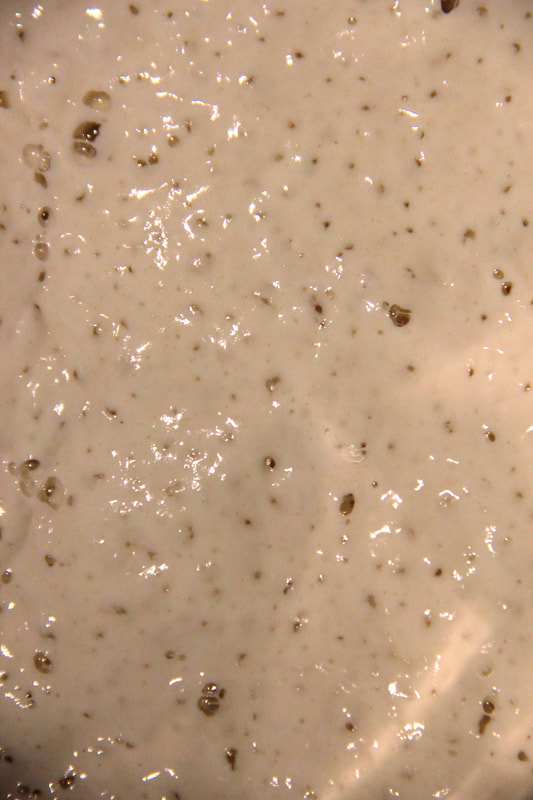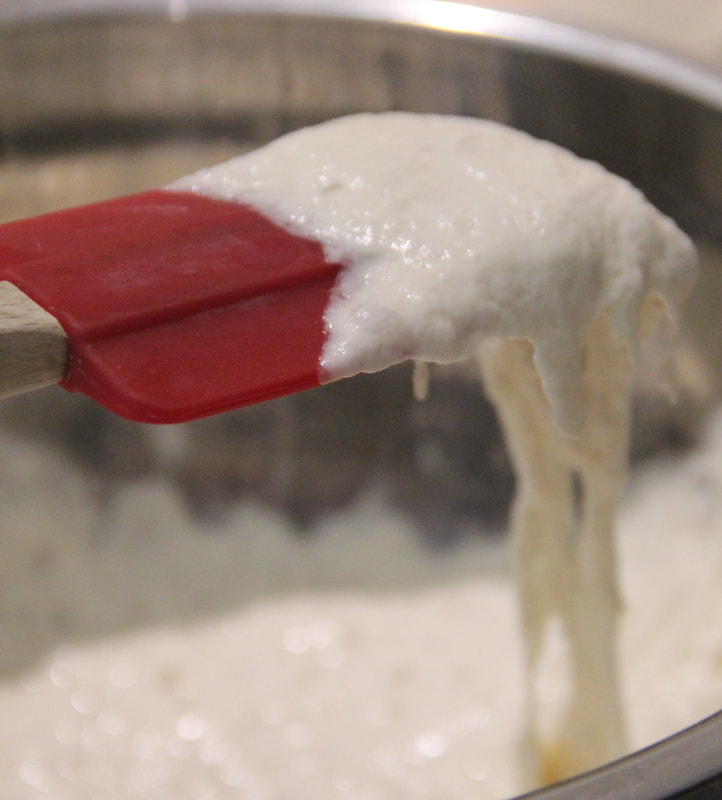
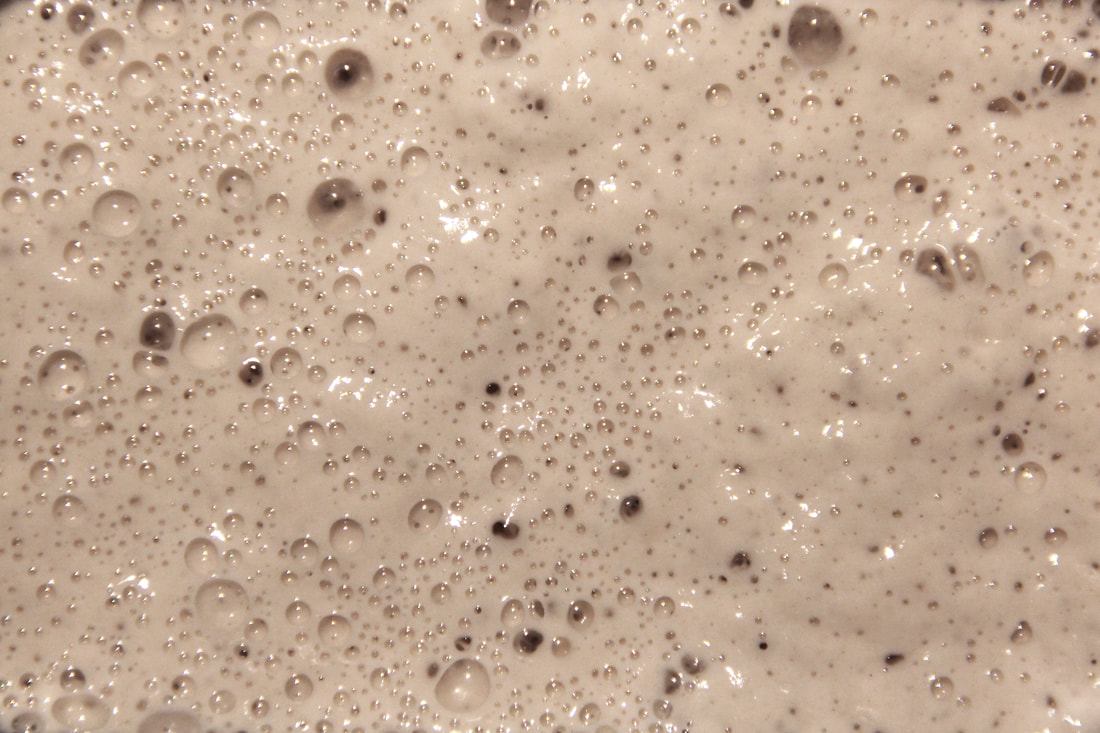
 This guide will walk you through maintaining an established sourdough starter. This is handy for folks who want to start baking with sourdough, but aren't ready to coax their own starter to life. You can get a sourdough starter by asking a fellow baker or bakery to share their starter, which is also referred to as a sourdough, mother, or levain. I'm always happy to disperse some of my four-year-old starter to folks in D.C. - leave a comment or send me a note and I'll get you some! Sourdough is a living culture, similar to Greek yogurt, cultured butter, kombucha, and other fermented products. It’s an intertwined ecosystem of lactic acid bacteria, called lactobacilli, and different strains of wild yeast, and it's maintained with the proper balance of flour, water, air, and time. The lactobacilli breaks down flour and water into starches and sugars while creating an acidic environment that wards off other bacteria and gives the starter its sour tang. The wild yeast feasts on the sugars and produces carbon dioxide as a byproduct, creating the bubbles and rise in the starter. To encourage that natural process, you need to keep your starter cozy, balanced, and fed in order for it to be stable and active for your baking projects. There are many different ways to create a sourdough starter, and I'll be creating a guide for that soon, too. One of the most intriguing methods I learned about is from Ruth Allman's "Alaska Sourdough," which suggests leaving a pot of potato water, flour, and sugar out until it starts bubbling, while counseling Alaskan frontiersmen to watch their thermometer closely. I created mine in 2016 following the simplest method: air, flour, water, and time. And that’s all your starter needs to stay happy, too. FEEDING YOUR STARTER  One of the most important steps to keep your starter healthy is knowing when it's ready to be refreshed or fed. A few visual clues are if you can see air pockets through the side of the container, if there are elevated, glistening bubbles on the surface of the mixture, and if its volume has doubled from its original size. Scent-wise, your starter should smell ripe, with a vinegary, yeasty, tangy, fruity aroma. If the bubbles are small, the volume of the mixture has receded, or it smells alcoholic, your starter is over-fermented and definitely needs to be fed. This happens when the lactobacilli and wild yeast in your starter have consumed all the flour and water available. The lactobacilli starts to get overly acidic and sour, overwhelming the yeast with too much lactic acid and stopping the production of carbon dioxide. Baking with an over-fermented starter or levain will contribute to a stronger sour taste and diminish your bread's rise. I maintain my sourdough starter at 100 percent hydration, which means it's kept at a ratio of 1 part flour to 1 part water. The reason that's considered 100 percent hydration is because bakers percentages are determined by a formula's flour weight. Here, the water is 100 percent of the flour weight. Thus, 100 percent hydration starter. If I've given you a sourdough starter, it contains approximately 50 grams of mother starter. To feed or refresh any size starter:
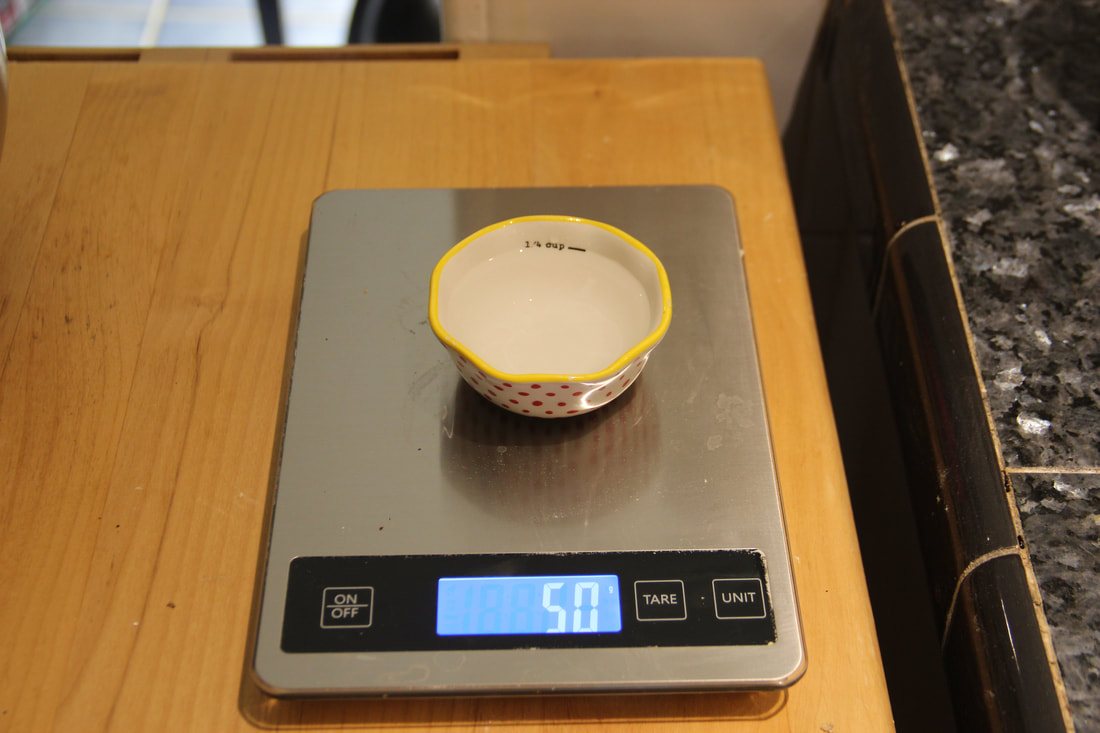
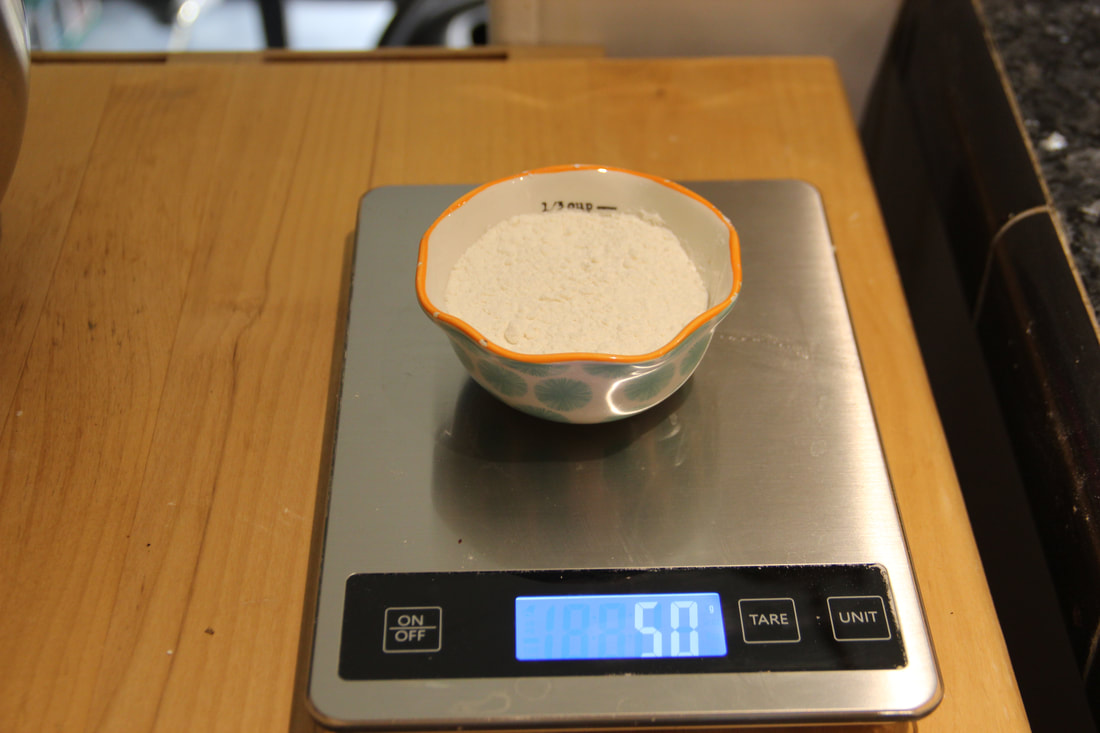
Weighing bread baking ingredients is much more precise than measuring their volume; however, if you don’t have a scale or don’t want one, you can look up rough conversions from grams to cups and use that approximate estimate. 50g of water is about 1/4 cup, and 50g of flour is about 1/3 cup. Your starter’s activity is greatly influenced by temperature. If your culture is stored in a chillier spot, its metabolism will slow down, taking longer to reach peak fermentation than if it's in a warm location. Use this knowledge to aid your baking process. If you want to speed up its activity, put it near your stove or heater. If you want to slow it down, store it near a drafty window. Just don’t heat it above 110 degrees Fahrenheit, as that will kill off the yeast. After feeding your starter, loosely secure the lid of its container or cover it with a tea towel in order to allow the carbon dioxide to escape. The culture will start to froth, bubble and expand, letting out gas along the way. It can take anywhere from 5 to 12 hours for the starter to hit its peak — a good rule of thumb is about 8 hours — and then it will begin to recede. To feed you sourdough starter a second time without building up its mass:
The removed sourdough, which is often called “discard", can be thrown away, used, or saved in your fridge and substituted in to your favorite recipes in place of equal parts flour and water. Some of my favorite uses for discard are Greek yogurt flatbreads, muffins, crackers and pancakes.
BAKING WITH YOUR STARTER 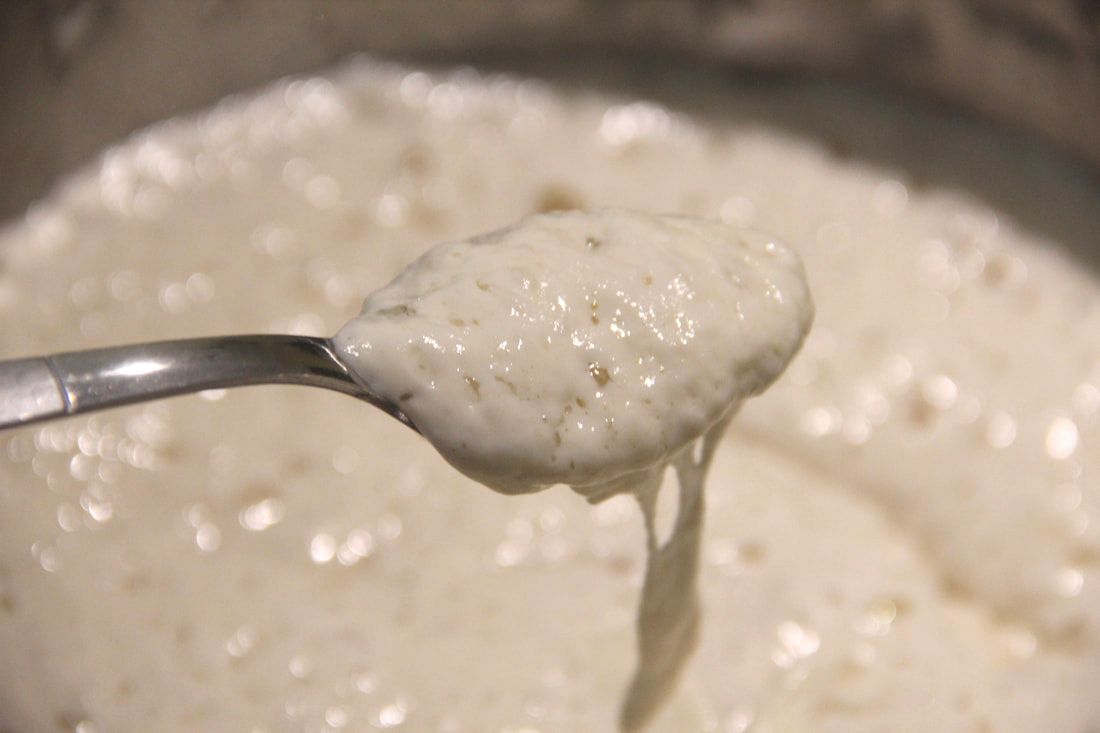 You want to use your sourdough starter at its most active, bubbly level when you're baking, so that means you have to plan ahead. It can take a few feedings to make sure your culture is awake and moving, especially if you store it in the fridge (more on that below). A reliable way to check that your sourdough is primed before you start baking is by using the float test. When you think your starter is at its peak activity level, break off a small piece and drop it into a cup or bowl of water. If it floats, that means it’s ready to use. If your recipe calls for more than 100g of sourdough starter, then you’ll want to “build” up your starter before you plan to start baking. To do this, you can skip the discard step when feeding your starter, or remove less than 2/3 of its weight before replenishing it in order to make sure you have the right amount of starter before you start baking. And make sure you always have a buffer so that when you're mixing your sourdough starter into your full recipe, you have some left over to keep your starter going. And some recipes call for a “levain” or “pre-ferment,” which means creating a different mixture of grains and water (and sometimes other ingredients too) with your sourdough starter before baking, rather than using your 100 percent hydration sourdough starter. If so, make sure to save a portion of your original starter in a separate container so that it can live on in its original form.
STORAGE 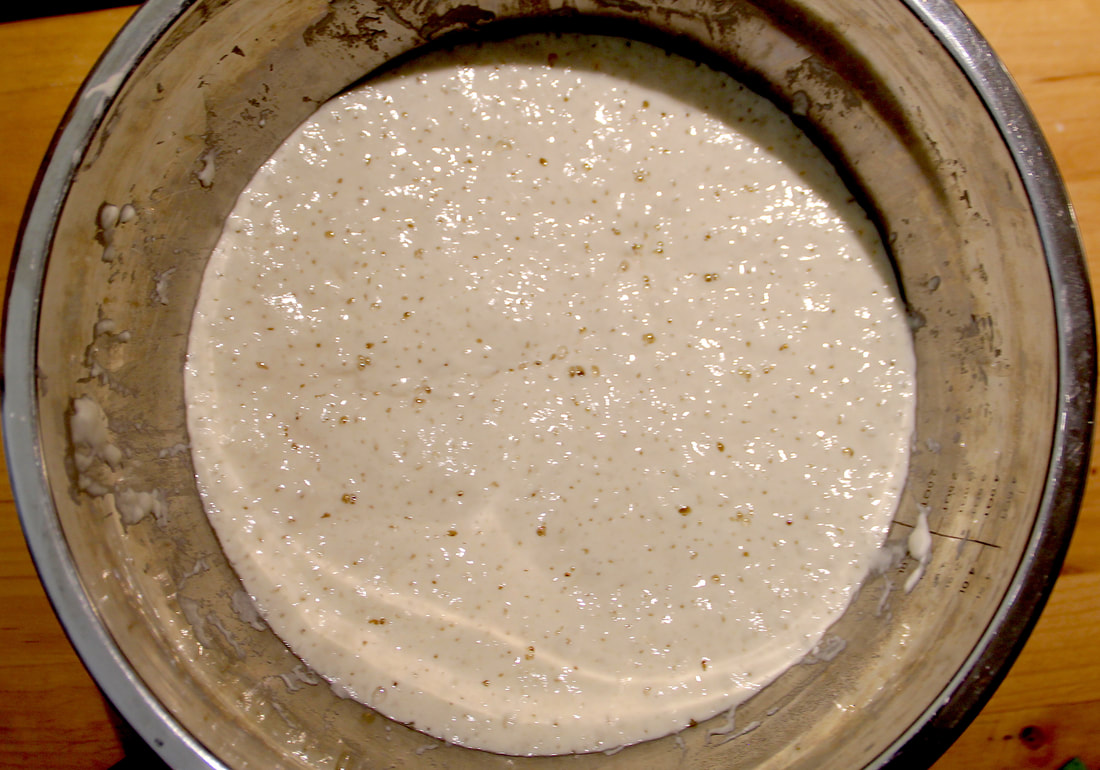 Not ready to bake with your sourdough starter? Make sure the container is covered tightly with a lid and place it in your refrigerator. This will slow down its fermentation to a sluggish pace, letting you take a break from feeding it while you’re not using it. A good rule of thumb is to “wake” it up every week with a fresh feeding and some time at room temperature for the culture to work its way through its new food source, but I’ve brought back my culture after 4 dormant, chilly months before, so don’t sweat it if it lingers there for a few weeks. It will just take more feedings to get back to its normal, active level.
WAKING UP A DORMANT STARTER 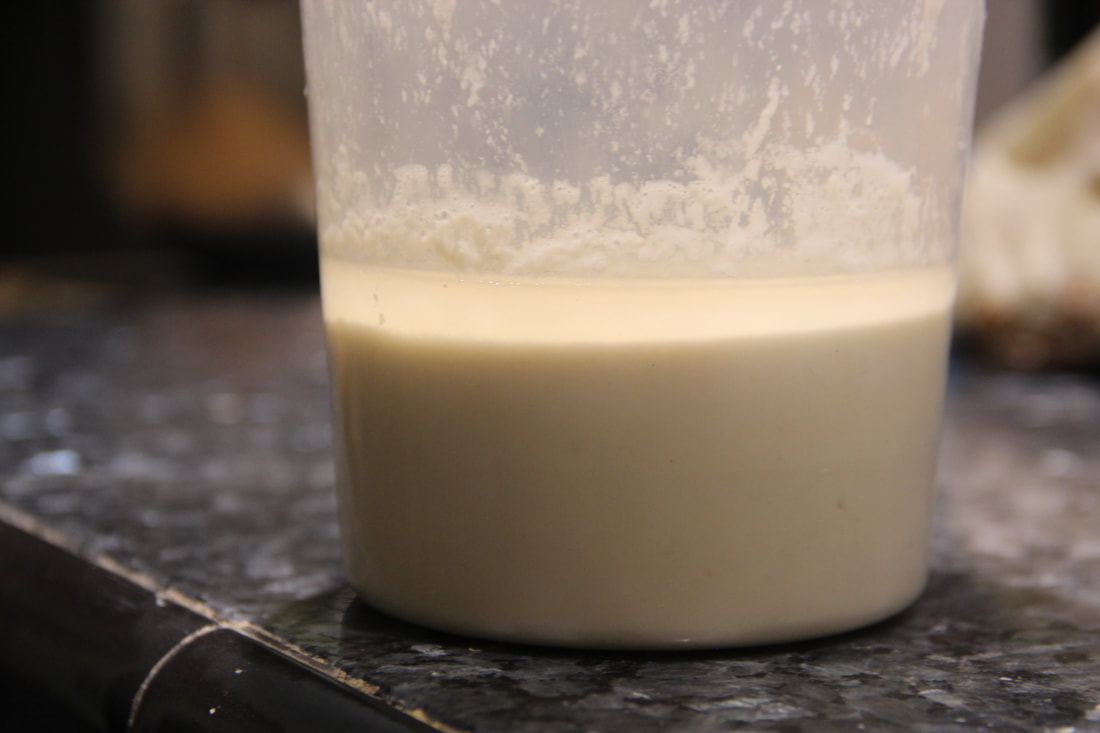 To wake up your starter after it's been stored in the fridge for a week or more, remove it from the fridge and allow it to come to room temperature. This can take anywhere from 1 hour to 4 hours, depending on the size of your starter.
Don’t be put off if the top has developed a grayish tint, if there’s a layer of liquid gathered on top of the culture, or if it smells particularly alcoholic; just mix it up and feed your starter as outlined in the section above. If it’s any other color, though, be wary. A stable sourdough starter will ward off bad bacteria, but if it’s been severely neglected, it could get infected with harmful organisms. This rarely happens. If it has an orange or pink hue or a fuzzy, moldy surface, throw it away. Keep refreshing your sourdough 2-3 times a day, until its back to its bubbly, tangy self.
0 Comments
 Rye is a magical, fearsome, and wholesome grain. Often grown as a cover crop, it's excellent at preventing field erosion over long winters and is relatively inexpensive for farmers. And rye is delicious for baking, especially when in naturally leavened breads.
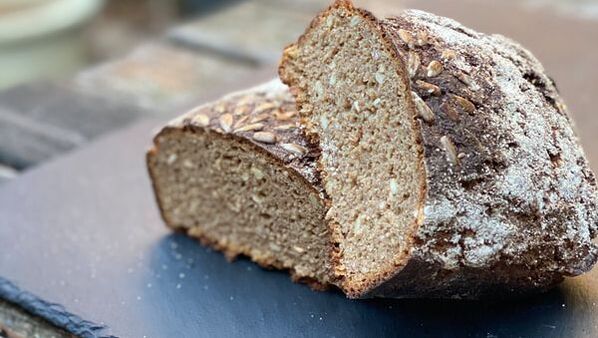
Baking with rye is quite different than baking with wheat, especially in this 100% rye recipe, because of the grains' different chemical compositions. Rye still contains a type of gluten (a prolamin called secalin), but it can't create the same elastic bonds that wheat's gluten proteins (glutenins and gliadins) do. Instead, pentosans (a complex sugar present in rye that is also in wheat, but in lesser amounts) and starches are responsible for rye's crumb structure. When mixed with water, the pentosans in the rye swell and absorb large amounts of water, while its amalyse enzymes break down starches into sugar. But too much sugar and not enough starch will cause the rye bread's structure to collapse. Bakers refer to this as "starch attack." One way to slow down the enzyme activity and protect rye's crumb structure is to acidify the dough with sourdough starter. Another way is to use scalded, pre-gelatinized rye four as a portion of your dough. This recipe employs both techniques, and was developed for the Starrs Sourdough January 2020 sale. This is a 100% rye sourdough recipe with whole rye berries and sunflower, flax, and pumpkin seeds, using a rye sourdough starter. If you have a whole wheat or all-purpose wheat flour starter and don't want to make a new whole rye one, you can substitute in your own starter. The final dough won't be exactly 100% rye, but it'll be pretty close! The bakers percentages are listed alongside the ingredient weights, as well as for the total formula. RECIPE Yields one 1135-g loaf Levain 25g rye starter (20%) 125g whole rye flour (100%) 125g water (100%) Scald 125g whole rye flour (100%) 25g rye berries (20%) 25g sunflower seeds (20%) 25g flax seeds (20%) 25g pepitas (20%) 250g water (200%) Final mix 250g whole rye flour (100%) 125g water (50%) 10g salt (4%) (+ 475g scald and 275g levain) Total formula 500g whole rye flour (100%) 500g water (100%) 25g whole rye berries (5%) 25g sunflower seeds (5%) 25g pepitas (5%) 25g flax seeds (5%) 25g rye starter (5%) 10g salt (2%) EQUIPMENT Loaf pan Three bowls Mister or cast iron pan Plastic bowl scraper (helpful, but not required) Kitchen thermometer (helpful, but not required) PROCEDURE 1) Ensure your rye starter is active and bubbly by feeding it about 8 hours before you begin to mix your levain, and a day before you plan to begin your final mix. I usually feed my starter the morning of the day before I plan to bake. 2) 8-12 hours before your final mix, prepare your rye levain and scald. I usually do this the evening before I plan to bake.
3) The next morning, check your rye levain's activity level. When it seems to have reached its full expansion (about double its size when mixed the night before), combine the remaining mix ingredients.
4) Let ferment for 1 - 2 hours. 5) Line or spray a loaf pan and moisten or oil your hands. Then, scoop the dough into the tin and smooth the surface. This is where a plastic bowl scraper comes in handy. Sprinkle extra rye flour on the top of the loaf and place in a warm area. 6) Preheat oven to 500 degrees F. Ready your spray bottle/mister or place your cast iron pan at the bottom of the oven and boil more water about 30 minutes from your bake time. 7) Let bread proof for 1 - 2 hours. Rye doesn't rise anywhere near the same amount as wheat, or feel the same when poked. When the rye flour at the top develops cracks, it's a good indication that the bread is proofed. 8) Put the bread into the hot oven, and either mist with a spray bottle of water or pour boiling water into the cast iron pan at the bottom of the oven to create steam. Bake for 10 minutes at 500, then drop to 450 for 20 minutes, then 400 for about 30 more minutes. When the bread temperature is over 200 degrees F, remove from the oven to cool. 9) I recommend waiting at least 24 hours before cutting into this dense, nutty, aromatic loaf. Rye can be quite gummy if sliced earlier. It will last a week or more in your bread box or stored in a paper bag. |
Guides
AuthorI started baking sourdough bread in 2016, and was immediately hooked. Since then, I've worked as a home baker, professional baker, and cottage baker, serving up naturally leavened breads and pastries to communities in Washington, D.C., and Alaska, where I'm now based.
|